Number attribute
Store an integer or decimal number
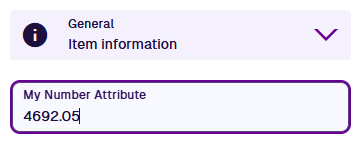
A Number attribute can store a single number to any amount of decimal places.
Configuration
When adding or editing a Number attribute on a design/interface, you can configure the following properties. These determine how the attribute will behave when users populate its value on corresponding items.
- Name * - enter a distinct name that clearly identifies the attribute.
- Description - describe what the attribute represents and how it's intended to be used. This helps users and AI agents to understand its purpose.
-
Required - if enabled, the attribute will need to be populated with a value before the item can be saved. It can't be left blank!
-
Read-only - if enabled, the attribute can only be populated when creating items. It can't be edited later!
-
Unique - if enabled, the attribute won't accept a value that's already stored in the same attribute on another item of this design/interface.
- Default value - the attribute will automatically be populated with this value, which can usually be changed before saving (unless it's Read-only or excluded from an item form).
-
Min - the attribute won't accept a value smaller than this number.
-
Max - the attribute won't accept a value larger than this number.
-
Decimal places * - enter the desired amount.
-
Tags - use the Tag Manager to select a custom tag or relevant system tag, such as:
-
Currency - the attribute will be displayed in your locale's currency, e.g.
234.5will appear as£234.50. -
Percentage - if the attribute is configured to hold a decimal value between 0 and 1, it will be treated as a percentage.
-
AutoIncrement - the attribute will be automatically populated on item creation. See below for details.
-
- AQS agent enabled - if disabled, the attribute is excluded from AI agent queries.
The Code field is read-only. It displays the attribute's Global Unique Code (Guc).
Populate the attribute on items
When creating or editing an item, select the attribute to start typing in it. Enter or paste in a number that meets the configured restrictions.
Auto increment
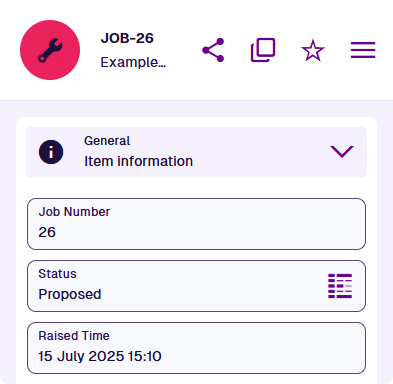
A design may benefit from having an incrementing Number attribute, which is set automatically for each new item. This can be added as a variable in the design's title/subtitle for easy identification.
For example, all jobs have an automatic Job Number attribute inherited from the standard Jobs interface, which is displayed in each job item's title.
To enable this behaviour when adding or editing a Number attribute on a design/interface:
-
Select its Tags property, enable AutoIncrement and then select Save.
-
Enable Required and Unique to ensure no items can receive the same number.
-
Set Decimal places to 0 and leave these blank: Default value, Min, Max.
The attribute won't be visible when creating or editing an item because it's set automatically. Existing items will receive the attribute when they're next edited (consider using a bulk action to Touch them).
How it works
If AutoIncrement is enabled on an attribute, an item of the Counters design is created, with its Number attribute set to 1.
When an item is created, its AutoIncrement attribute is populated with the counter's number. The counter then always increments, even if item creation fails (e.g. due to lack of permission). This can result in numbers being skipped.