Component designs
Represent component parts
If some of your assets are made up of distinct component parts, it's important to keep track of them too! CausewayOne Asset Management lets you manage components in the same way as regular assets, helping you to maximise performance and reliability across your inventory.
Assets and components can be linked together in parent/child relationships. These can be visualised using item graphs, making it easy to browse connected items and add/remove components as needed.
To get started, you need to represent your components in CausewayOne Asset Management:
-
Create a design for each type of component.
-
On each component design, add attributes for the data points you want to record about that component type. This may include implementing one or more interfaces to inherit their attributes alongside the ones on the design.
-
To associate a component type with a parent asset type (or another component), add a Link attribute on the asset design that points to the component design.
-
Create items of component designs to represent actual components.
-
To connect a component item to a parent asset item (or other component), add it to the corresponding Link attribute on the parent item.
Create a component design
To create a design that represents a type of component:
-
On the start screen, select Create design. If one is already open, select Create design in the top-right corner instead.
-
Choose the Component design type.
-
Fill in the details and then select Create design.
You can then edit the design to manage its attributes, links and other properties.
If you're unable to create a design, your user account may lack the required permissions.
Standard component design details
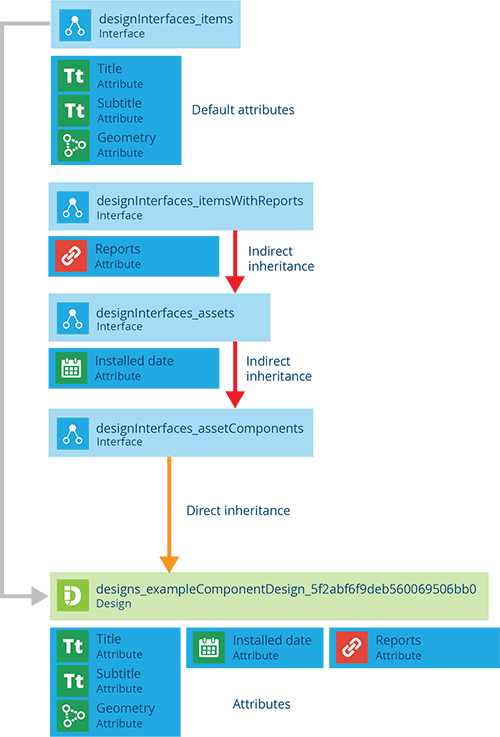
All component designs implement the Asset Component interface. Therefore, all component items inherit a standard set of properties and attributes. Required attributes are marked with an * asterisk.
Details
If left blank or unchanged, the component design will inherit the following properties:
-
Collections - component items can belong to any collection.
-
Geometry - is optional and all geometry types are allowed.
-
Icon -
icon-structure-component -
Colour -
#3d8fbd
Attributes
The following attributes are inherited from the implemented interfaces:
- Installed Date - when the component was installed at its location and entered into service.
Link attributes
The following Link attributes are inherited from the implemented interfaces:
- Reports - links to any generated reports involving the component.
Interfaces
The following interfaces are inherited directly:
- Asset Components
The following interfaces are inherited indirectly via the above interfaces:
-
Assets
-
Items With Reports
Diagram
Link other designs to the component design
For each design that needs to reference a component type:
-
On the start screen, select Designs and open the relevant design.
-
Scroll to the Link attributes section and select Add attribute.
-
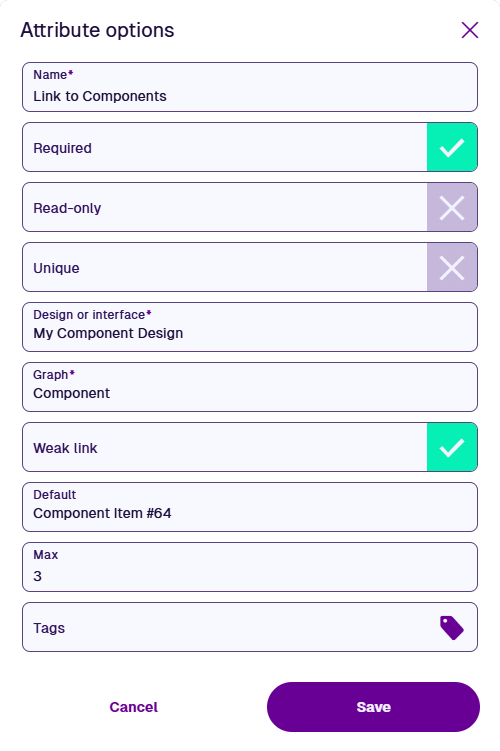
Fill in at least the following fields and then select Save:
-
Name * - enter a distinct name that clearly identifies the new attribute.
-
Design or interface * - choose the relevant component design.
-
Graph * - choose the Component graph.
For details about the other fields, see Link attribute.
-
Create component items
Once you have a design that describes a particular type of component, you can create items of that design to represent actual components.
To create an item of a component design:
-
On the start screen, select Designs and open the component design.
-
Select + Create item in the top-right corner and choose the component design.
-
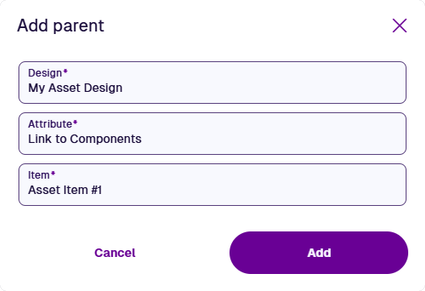
To link the new component to a parent asset (or another component), select Parents at the top and then Add parent. Fill in the following fields:
-
Design * - choose the design of the parent item (only compatible ones are listed).
-
Attribute * - after choosing the design, specify the Link attribute to use.
-
Item * - after choosing the design, specify which of its items should link to the new component.
Select Add to continue.
-
-
Fill in the component's attribute fields as needed.
-
Select Create to finish.

To link an existing component item to a parent, select the item to view its details. In the Parents section, select Add parent.
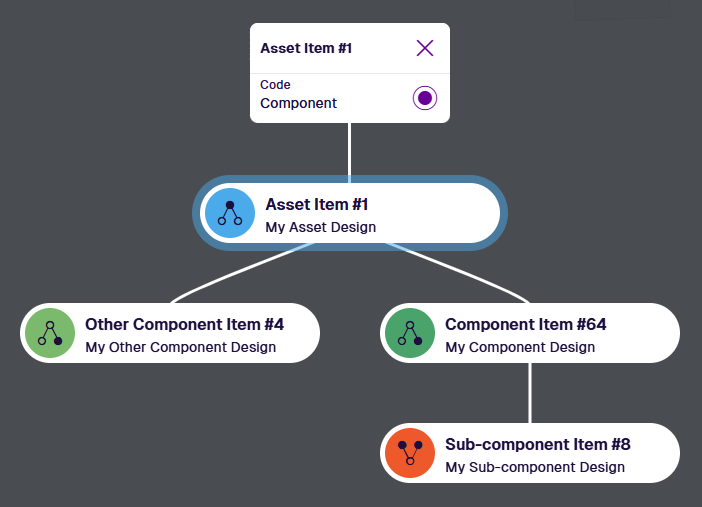
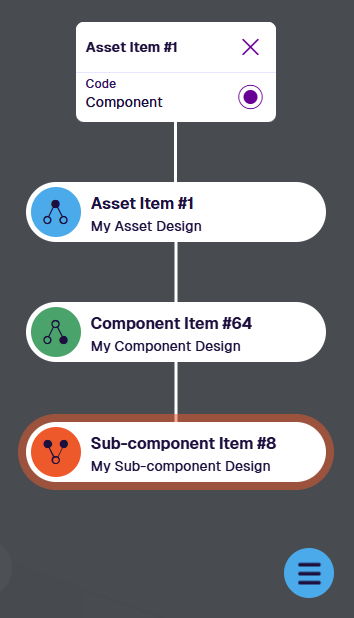
View an item's component graph
When viewing an asset or component item, the Graph View section may be available. It can provide an interactive visual representation of the component hierarchy.
Select a component item in the graph to view its details, where you can edit or remove the item if needed.
Add a new component
To create a new component item that's automatically linked to the selected item on the graph:
-
Select Menu (bottom-right) and choose Add item.
-
Choose a compatible Link attribute on the selected item to add the new component to.

-
If the chosen Link attribute applies to an interface, the designs that implement it will be listed. Choose the design of the new component.
-
The Item Creator will appear. Fill in the fields as needed and select Create item to finish.
