Map section
Visualise item location and geometry
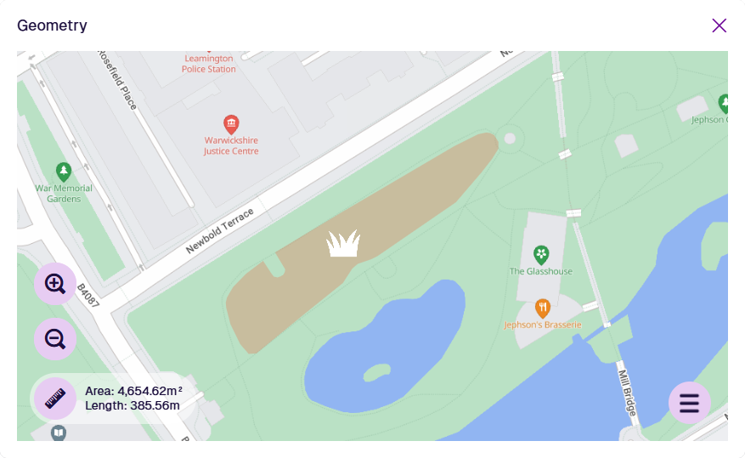
When viewing an item's details, the Map section lets you view and edit the item's main Geometry attribute.
If the item has any geometry set, it will be visualised in the map area. Depending on the item's design, the geometry may be a point, a line of points, a polygon, or a collection of different types! To learn more, see Geometry Types.
Computed dimensions are displayed below the map area by default, such as the item's central point, length and area (where relevant).
To reload the section's contents, select Refresh at the bottom.

Defects, inspections and jobs typically inherit the same geometry as their parent asset.
Expand the map
Select the map area to open an expanded view of the item's geometry and the surrounding environment. Drag the map to pan around and use the tools to Zoom in and Zoom out (or use the scroll wheel on your mouse).
Edit item geometry
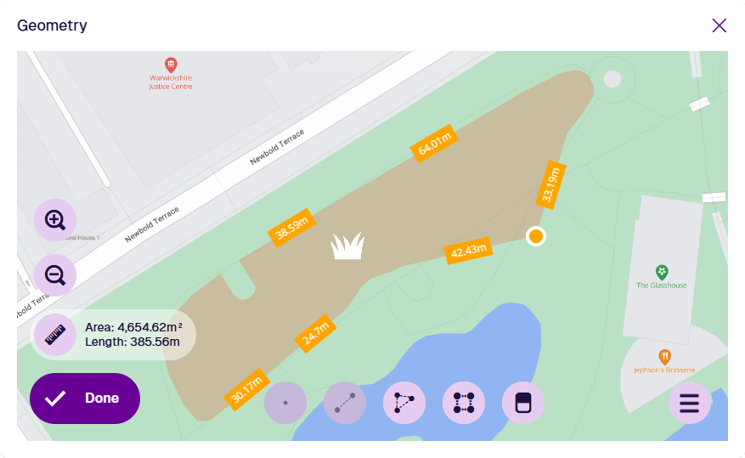
Select Edit at the bottom of the section to open the Geometry Editor.
To alter existing geometry, select and hold anywhere along an edge, and then drag the new point to the desired position (illustrated below). To remove points, select the Remove tool and then select any orange circle to remove that point. Alternatively, open the bottom-right Menu and choose Clear all.
To add new geometry, select one of the draw tools. If a tool appears dimmed, no additional geometry of that type can be added. Select one or more points on the map to plot your geometry.
Point
Select the Point tool and then select your desired location on the map.
Once a point is selected, the Point tool becomes dimmed to indicate that no further points can be added. To reposition the point, drag it to another location, or use the Erase tool to remove it and start again.
Select Done to save your changes.
Line
Select the Line tool and then select a starting point on the map. Continue selecting points along your desired line. If you need to track a fine curve, select as many points as possible along it! To finish drawing, double-select the final point.
Once a line is finished, the Line tool becomes dimmed to indicate that no further lines can be added.
To edit the line, select an existing point (your mouse will snap to it) and drag it to a different position. To add a new point, select and hold anywhere along the line, and then drag the new point into position! Use the Erase tool to remove points as needed.
Select Done to save your changes.
Polygon
Select the Polygon tool and then select a starting point on the map. Continue selecting points along your desired shape. If you need to track a fine curve, select as many points as possible along it! To finish drawing, double-select the last point (or select the starting point again).
Alternatively, you can use the Box tool to draw a rectangle between two diagonal points.
Once a polygon is finished, the Polygon tool becomes dimmed to indicate that no further polygons can be added.
To edit the polygon, select an existing point (your mouse will snap to it) and drag it to a different position. To add a new point, select and hold anywhere along an edge, and then drag the new point into position! Use the Erase tool to remove points as needed.
Select Done to save your changes.
To finish, select Done in the Geometry Editor, and then Save at the bottom of the Map section.
If you're unable to edit the item, your user account may lack the required permissions.