Layers panel
Manage your visible layers
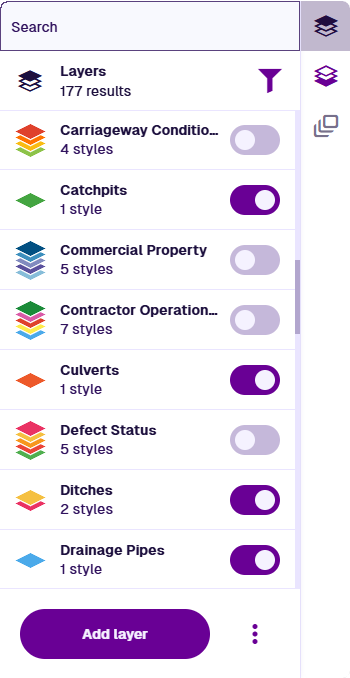
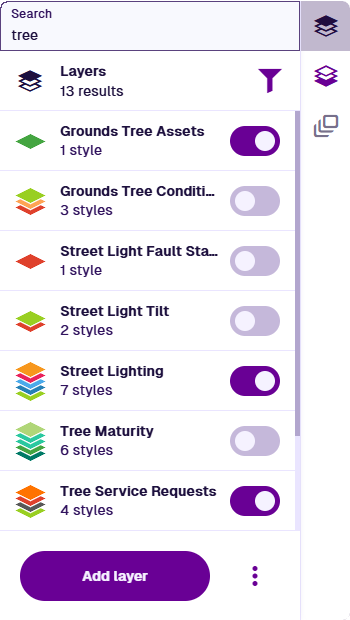
To use and manage the layers in your company project, select Layers in the right toolbar to open the Layers panel.
Turn layers on or off to control the visibility of items on the map. Find specific layers with the search box or by filtering layers with tags. Add custom layers to display specific sets of items or third-party data from Web Feature Services (WFS).
If you're unable to view or manage layers, your user account may lack the required permissions.
Turn layers on/off
Turn layers on or off using their switches. The order that layers are turned on determines the order of items on the map. Items of layers activated later will appear above items of layers activated earlier.
When you turn a layer on/off, all of its layer styles are also turned on/off, causing items targeted by those styles to appear/disappear on the map. The layer's icon and subtitle indicate the number and order of its styles.

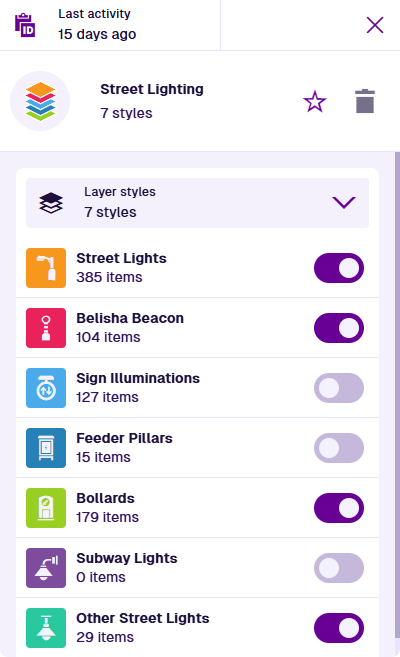
To turn individual layer styles on/off, select the layer to open it, and then use the switches in its Layer styles section. The order of this list determines the order of items on the map. Items of higher styles will appear above items of lower styles.
If you can't turn on a layer, it may be disabled.
Temporary layers
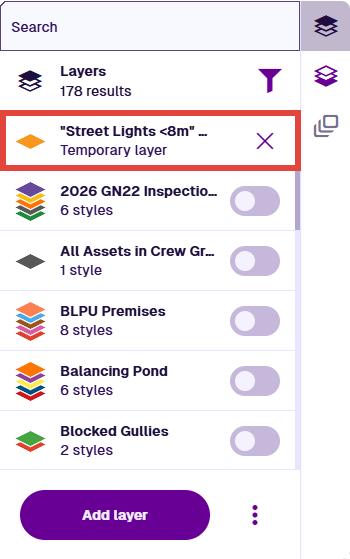
In the Data Explorer app, the Open in action lets you view the results of a query in the Maps app. The results appear as a temporary layer, which is only visible to you and remains available until your session ends.
Temporary layers are always turned on. They disappear automatically when you sign out of CausewayOne Asset Management or close the browser tab. To remove a specific temporary layer, select its Remove button.
Clear the map
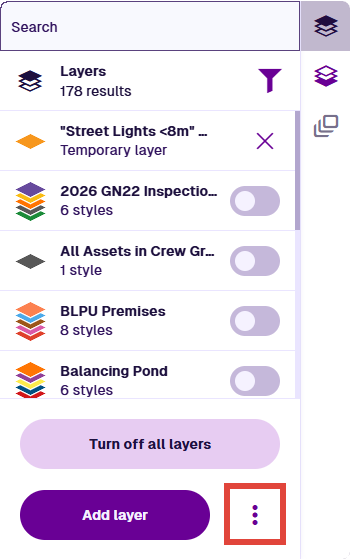
To quickly turn off all visible layers and clear the map of all items, select More and choose Turn off all layers.
This will remove any temporary layers from the list!
Find layers
Use the top search box to find layers matching one or more terms.
Filter by tag
When you add or edit a layer, you can populate its Tags property with one or more tags. This provides a way to categorise your layers however you like, e.g. by asset class, activity type, service area. You can then filter the Layers panel to only show layers with specific tags.
To filter layers by tag, select Filter (top-right) and fill in the following fields:
-
Tags - select one or more available tags.
-
Tags filter type - choose one:
-
And - only show layers with all of these tags.
-
Or - only show layers with at least one of these tags.
-
Not - only show layers without any of these tags
-
Select Save to finish. To clear the filter, select Filter, deselect all tags and select Save.

Add a layer
To add a custom layer, select Add layer at the bottom of the Layers panel and fill in the following fields:
-
Title * - enter a distinct name that clearly identifies the layer.
-
Tags - select any available tags that apply to the layer.
Select Save to finish. You can then proceed to edit the new layer's properties and add layer styles.