Add a WFS style
Define a style that displays third-party data
When adding a layer style, choose Create WFS style to display data from a Web Feature Service.
WFS is an international protocol for serving vector graphics of geographical features, e.g. places, buildings, rivers, zones. Unlike other map services, WFS provides the data associated with each geographical feature instead of map images. This data can be used to represent those geographical features as items on the map, which display their full data when selected.
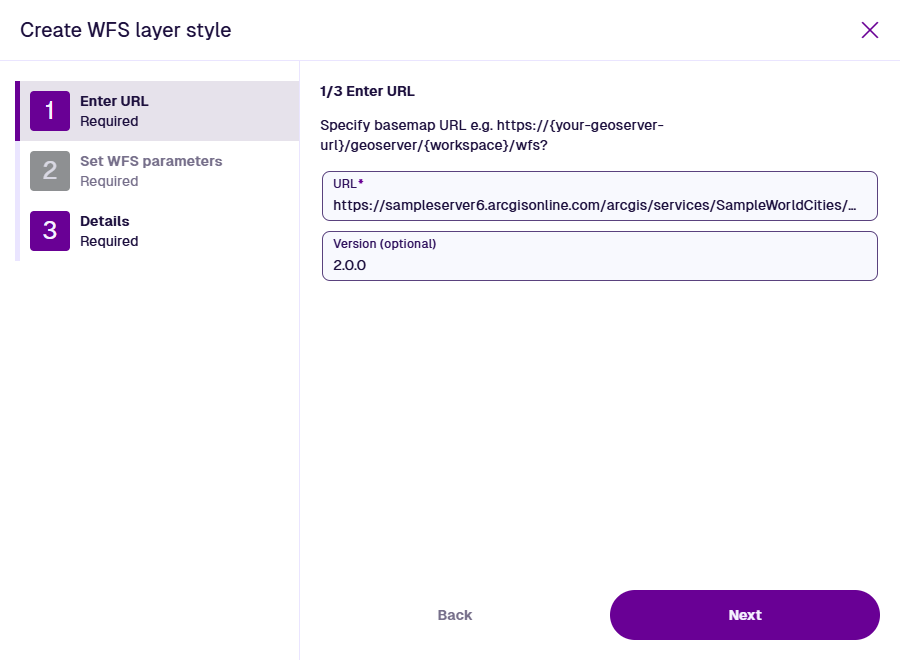
1 Enter URL
This step is required. Fill in the following fields as needed:
-
URL - enter the address of the WFS map service you want to use. A variety of URL formats are accepted, such as:
https://example.com/services/WFSServerhttps://example.com/services/wfs?https://example.com/services/wfs?request=GetCapabilities -
Version - the version of the WFS protocol used by the service. This can usually be left blank.
Select Next to continue.
2 Set WFS parameters
This step is required. Fill in the following fields as needed:
- WFS Feature Type * - choose one of the available feature datasets provided by the service.
- ESPG Code * - the coordinate system used to plot the chosen feature's geometry. If undetected, it will default to 4326, which is the WGS84 Lat/Lng system used internally throughout CausewayOne Asset Management (view on epsg.io).
-
Output Format - choose the data format of the chosen feature. If you're unsure, experiment and use the preview button until the expected data appears:
-
GML 3
-
GML 2
-
JSON (default)
-
ESRIJSON
-
KML
-
-
Load All Items Strategy - if enabled, all available data items will be loaded at once. Otherwise, only the data items located within the visible map area will be loaded.
To check your configuration and see how the data will look on the map, select Preview WFS layer style. When you're done, select the bottom button to return to the wizard.
Select Next to continue.

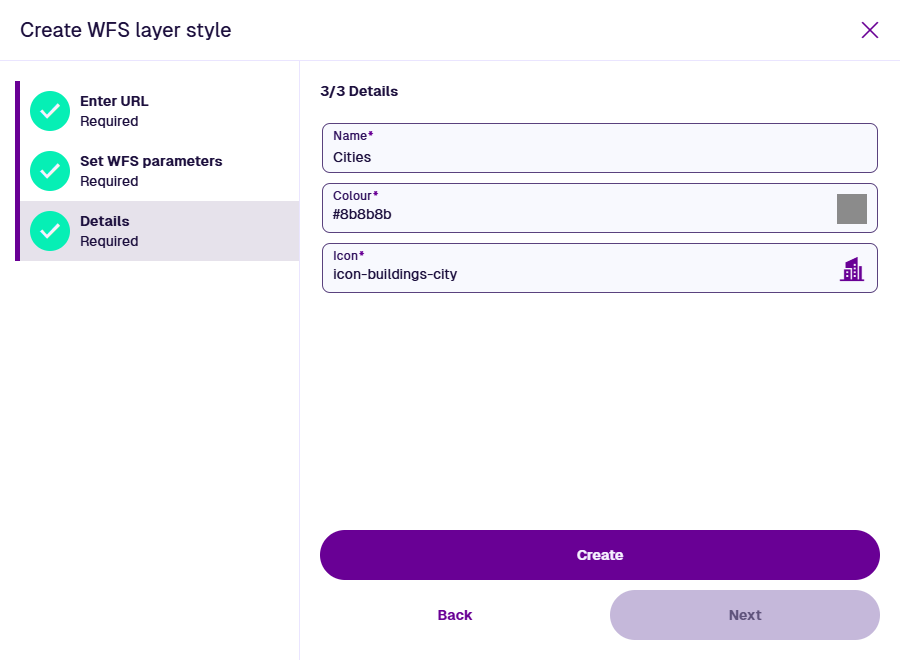
3 Details
This step is required. Fill in the following fields as needed:
-
Name * - enter a distinct name that clearly identifies the layer style.
-
Colour * - use the colour picker to set the colour of all items displayed by the layer style.
-
Icon * - use the icon picker to set the icon of all items displayed by the layer style.
Example
The WFS layer style illustrated below was created using the following URL:
https://sampleserver6.arcgisonline.com/arcgis/services/SampleWorldCities/MapServer/WFSServer
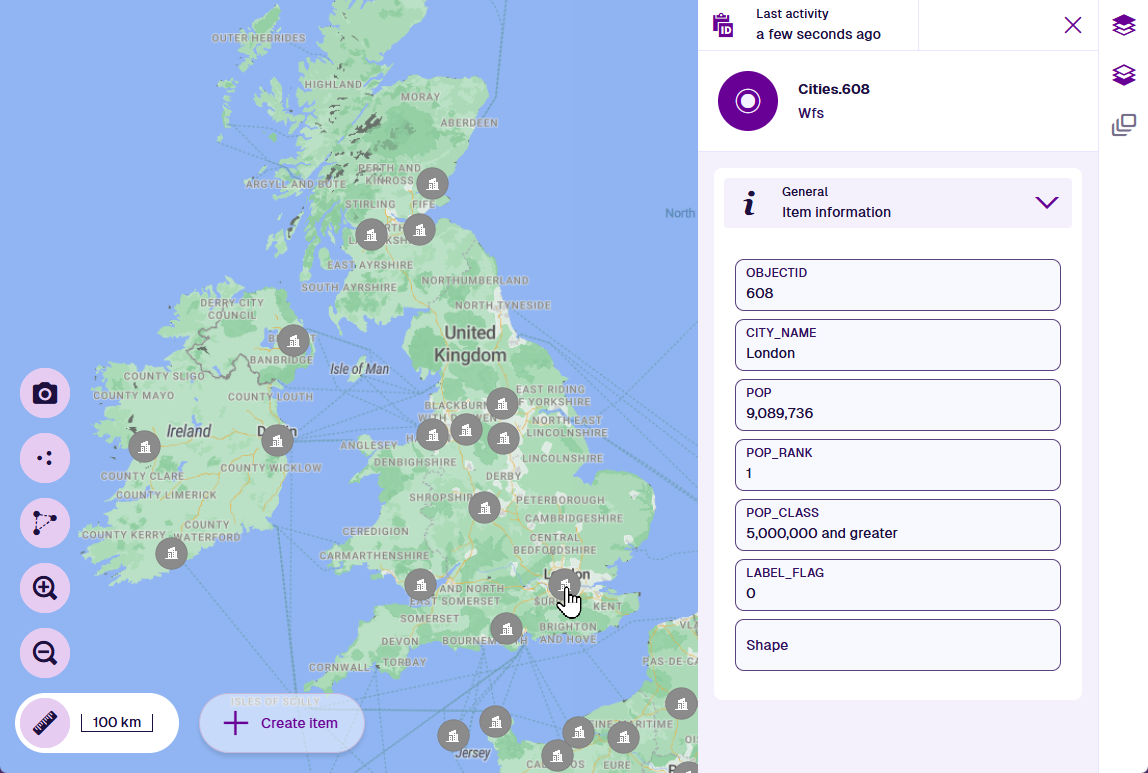
The availability of this example WFS service may change over time!