Locations of Interest
Maintain a list of commonly used places
If a particular place or area is often used by your organisation, you can save it as a Locations of Interest item, which can then be referenced elsewhere in CausewayOne Asset Management.
To display these items on the map, add a layer style that targets the Locations of Interest design.
Not to be confused with Locations, which represent addresses or landmarks obtained from Google Maps.
Use in Alloy Mobile
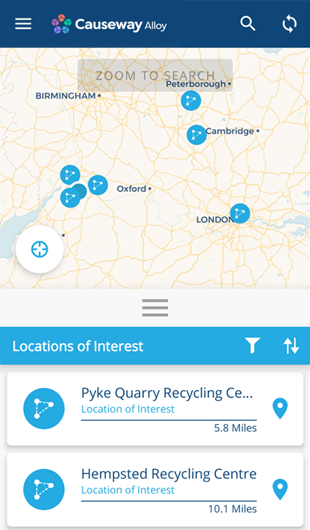
Locations of Interest are especially useful for defining buildings that mobile users travel to regularly as part of their assigned work, e.g. depots, warehouses, offices.
Although projects can have defined routes, it can be counterproductive to include a "return to base" waypoint if workers perform several routes a day.
Therefore, Locations of Interest can serve as handy shortcuts for workers to change their navigation on the fly, which are easily accessible from the Main menu of the app.
Use in AQS queries
As Locations of Interest can include any geometry type, you can also use them to define polygonal areas, e.g. districts, zones, counties. This makes them useful for performing AQS queries that fetch item data based on geographic location.
When building an AQS query that contains a geographic comparison node (Disjoint, Intersects, Within), you can point it to a Locations of Interest item instead of supplying a constant value.
This helps to ensure that data collection is accurate and consistent across different AQS queries. It also makes future maintenance easier, as you can simply edit the Locations of Interest item, rather than having to edit all the related AQS queries individually (some of which may reside within reports or workflows).
Create a Location of Interest
To create a new Locations of Interest item:
-
Open the Designer app via the left panel or the Overview page.
-
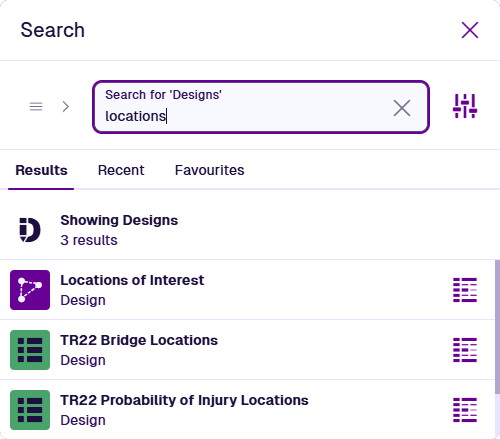
At the start screen, choose Designs. In the Search window, use the search box to find and select the Locations of Interest design.

-
Select Create item in the app bar.
-
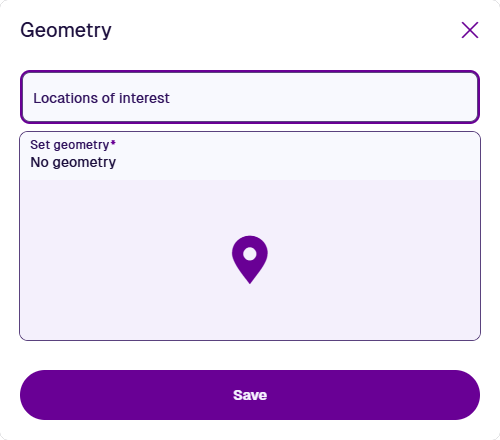
In the Item Creator, choose the design, and then select Location * at the top. Select Geometry * and use the Geometry Editor to draw points, lines or polygons to represent the location you're interested in.

-
Enter a distinct Name * that clearly identifies the location and then select Create to finish.