Manage memberships
View and edit user memberships
The last few columns in the table display the groups, roles and teams each user belongs to. These memberships determine what the user can access. If a membership column only contains a single object for a user, the cell will display the object's icon and title. Select the object to view its details in the side panel.
If a cell contains multiple objects, it will display an X results button. Select this to display the objects in a separate popover. You can then select one to view its details.
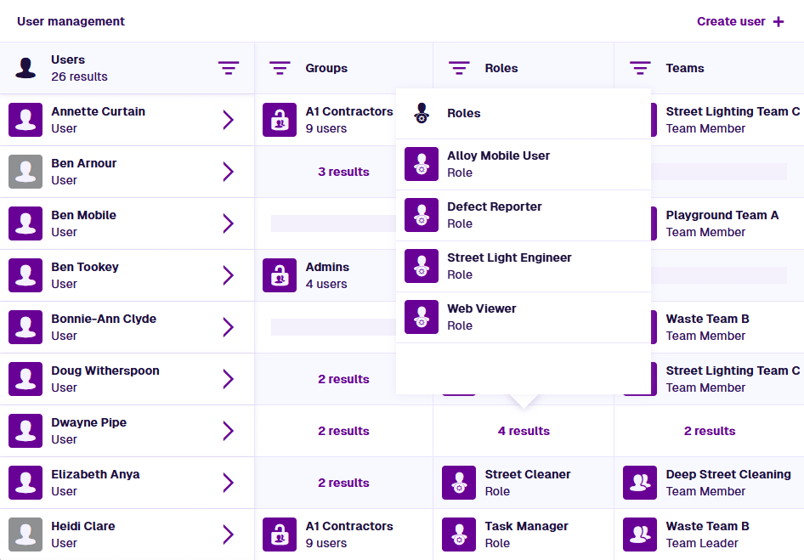
For Team and Team Member items, select in the popover to open those items in the Data Explorer app.
Groups
A group is a set of permissions that grant read/write access to specific Asset Management features, e.g. layers, workflows, items of a specific design/interface. These permissions can be extended with access policies that restrict access to items based on their data. By keeping groups minimal and modular, you can reuse them across multiple roles.
Some system groups grant access to a specific app, e.g. Apps Boards Viewers. A user must belong to the relevant group (directly or via a role) to open the app. Otherwise, it will be dimmed and inaccessible in the left panel. Members of the Admins group can access all apps.
If a user belongs to a group, they inherit its permissions directly.
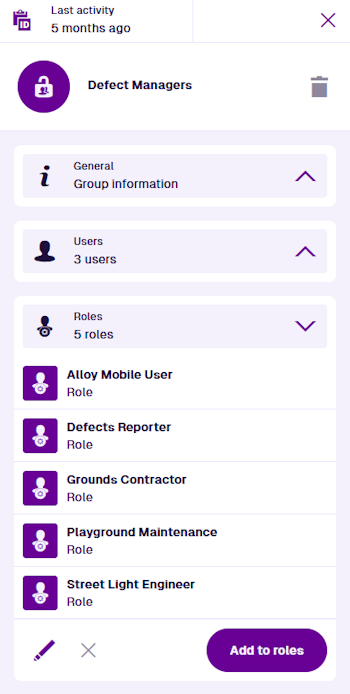
Open a group
Select a group to view its details in the side panel. This displays the following sections:
-
General - the properties of the current group.
-
Users - the direct members of the current group.
-
Roles - each of these inherits the permissions of the current group.
Use the buttons in each section to Edit their contents and Add more to the list.
To delete the current group, select Delete in the top-right corner. This is only possible if the group's Context is Customer.
Roles
A role is a bundle of groups that provides a combined set of permissions. It typically represents a position, persona or responsibility within your organisation. This is simpler than adding users to multiple groups and makes future maintenance easier.
If a user belongs to a role, they inherit the winning permissions of all its groups.
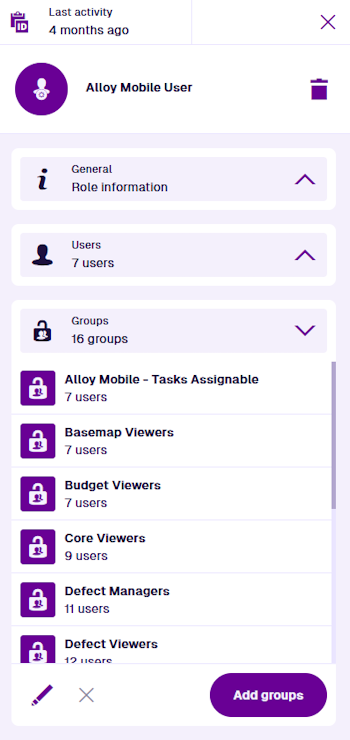
Open a role
Select a role to view its details in the side panel. This displays the following sections:
-
General - the properties of the current role.
-
Users - the direct members of the current role.
-
Groups - the current role inherits the combined permissions of all these.
Use the buttons in each section to Edit their contents and Add more to the list.
To delete the current role, select Delete in the top-right corner.
Teams
Teams are used for task assignment. A team determines which jobs and inspections are presented to a user for them to perform. Unlike groups and roles, teams are actually items of the Teams design! When you add a user to a team, an item of the Team Members design is automatically created to represent them. It links the user and team items together.
Open a team
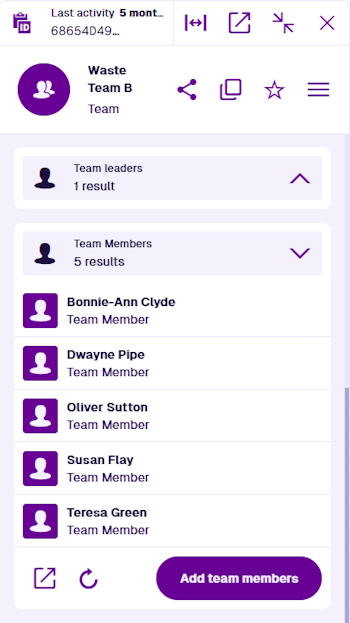
Select a team to view its details in the side panel. This displays many sections, including:
-
General - the attributes of the current team. Select Edit to rename it.
-
Parents - every item that links to the team, including assigned tasks and assets the team is responsible for.
-
Team Leaders - items representing each user that belongs to the team. While there are no practical differences between leaders and members, the distinction can be useful when assigning work or creating reports.
-
Team Members - items representing each user that belongs to the team.
To add one or more users to the team, select Add team leaders or Add team members.
To learn more about managing teams, see Teams in Asset Classic.
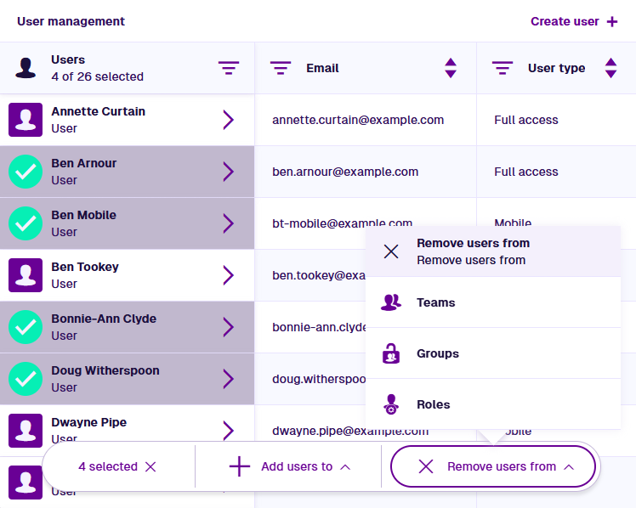
Bulk actions
Use the bottom toolbar to manage your user memberships:
-
Select one or more users in the table. The bottom toolbar will appear, displaying the number of selected users on the left.
-
Choose one of the following:
-
Add users to - any of the roles, groups or teams in your company project.
-
Remove users from - any of the roles, groups or teams that the selected users currently belong to.
-
-
Select one or more objects in the list and then select Save. A notification will appear to indicate success or failure.
-
Repeat as needed and then select on the left to clear your selection.