Inspections
Observe and record the condition of assets
Use inspections to plan and perform investigations of your organisation's assets. Record the state of an asset's condition by filling in data fields, answering yes/no to pre-defined questions and attaching photos from your device.
It's easy to view inspections as items on the map, which can be filtered according to their status. For a more detailed examination, perform a query in the Data Explorer to view a curated list of inspections and their attribute data.
Inspections are one of three activity types that are available to optimise your asset maintenance. They're entirely customisable and can be scheduled automatically as needed.
If you're unable to view or manage inspections, your user account may lack the required permissions.

Inspections are tasks
Inspections and jobs are collectively known as tasks, as they typically involve travelling somewhere to perform work.
However, inspections are solely focused on gathering data about an asset's condition. By contrast, jobs can represent any type of work that needs doing (and can even be formalised into discrete work units).
Task assignment
You can assign an inspection to a team of your choice and/or an individual team member. There's also the Task Assignment planner that displays unassigned tasks alongside a map and team calendar, letting you assign tasks by drag and drop!
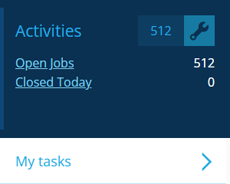
Team members can access their assigned tasks from the Activities dashboard card. It's also possible to create custom cards that display task counts for the current user.
Close inspections
You can close inspections to mark them as finished. Choose from a variety of task statuses (e.g. Completed, Cancelled) or create new ones to fit your organisation's operations.
Add inspections to a project
If you have a batch of related inspections (e.g. inspect each street light along a road), consider adding them to a project for easier task management. The entire project can be assigned to a team and closing the project automatically closes the tasks within it.
You can also create routes between the tasks in a project! Set the order of tasks and the fastest/shortest route between them will be calculated. Workers using Alloy Mobile can receive the route and use it to navigate, optimising their time and fuel efficiency.
Define your inspection types
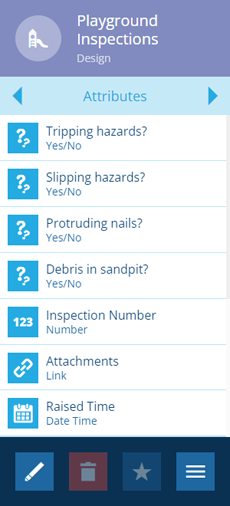
Before you can create inspections, your organisation must first create inspection designs to represent each inspection type.
Inspection designs automatically inherit standard attributes from the Inspections interface (e.g. Status, Raised Time). You can add any number of custom attributes as needed. Typically, inspections include questions for inspectors to answer, in the form of Yes/No attributes.
Some modules include ready-made inspection designs for common service areas.
Create inspections
Once your inspection types are defined, you can start creating inspection items!
By default, new inspections are linked to a chosen parent asset. Alternatively, you can choose a parent activity (e.g. to inspect a raised defect), or create an isolated inspection with no parent at all.
You can use workflows to automate the creation of inspections in response to events or according to a schedule.
Acting on inspection results
After an inspection has been completed, you can act on the condition data that was gathered. You may wish to register a new defect that was discovered, or a create a job to perform any work that needs doing.
You can also use workflows to automate what happens next, e.g. send an SMS when an inspection's Status is set to "Completed".
Inspections on the go
Workers out in the field can use Alloy Mobile to receive and complete inspections on their mobile device.