Job Work Unit Editor
Understanding the Job Work Unit Editor
Overview
The Job Work Unit Editor allows you to manage work items within one or more jobs.
Understanding the Job Work Unit Editor
The Job Work Unit Editor can be accessed from the Data Explorer or when managing work items within jobs.
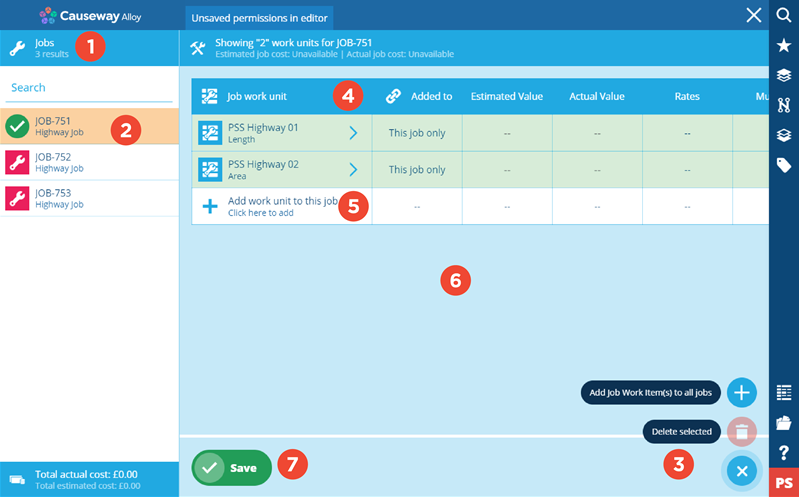
1 Job list
The left hand side of the editor displays a list of one or more jobs. Only one job is displayed when you work with a selected job from a search result. When you use the Data Explorer, you can select multiple jobs, which are listed in the editor.
2 Selected job
By default the first or only job is shown selected. If the Job list contains multiple jobs you can click on one or more jobs to manage work items for multiple jobs at the same time.
3 Editor tools
When you select the button the editor tools are displayed.
- Add Job Work Item(s) to all jobs - this allows you add work items to all the jobs in the Job list.
- Delete selected - this allows you to delete selected work items.
4 Work item attribute headers
The attribute headers associated with the work items are listed at the top of the work item display area.
5 Add work item
The work item button allows you to add a work item to the selected job, see Configuring job work items.
6 Work item display area
The list of work items for a selected job are shown in the display area.
7 Save button
When you have finished configuring the work items for the selected job(s) use the Save button to apply the settings.