Task assignment
Visualise and manage the work assigned to teams
Use the Task Assignment planner to see which tasks are assigned to which teams over a period, assign tasks as needed, and easily adjust their estimated start/end times.
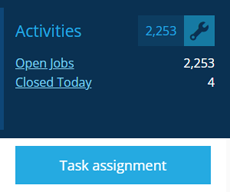
To open the planner, open the Activities dashboard card and select Task assignment.
Key features

To commit any unsaved changes, select Menu (bottom-right) and choose Save.
1 Unassigned tasks
By default, all tasks with a blank Team attribute are listed on the left (even if their Team Member attribute is populated). To narrow the list down to tasks of a certain type, select Menu (bottom-right) and choose Filter tasks.
Select a task to locate it on the map and view its details in the right panel.
To assign a task to a team, simply drag it to the desired timeslot for that team and release when the correct time is displayed. Its Estimated Start/End Time attributes will be set accordingly.
2 Map
All task items (assigned and unassigned) are displayed on the map. Drag the map to pan around and use the scroll wheel on your mouse to zoom in and out.
Select a task on the map to zoom in on its location and view its details in the right panel.
3 Planner
The planner lists the teams in your company project and visualises their assigned tasks as blocks, which are sized according to their estimated duration. To see more teams at once, drag the divider upwards to show more of the planner.
By default, each column represents a day, with the current date highlighted. To change the time interval of the columns, select Menu (bottom-right) and choose Change resolution.
Drag the planner left/right to see more columns. Drag the planner up/down to see more rows (or use your scroll wheel).
To unassign a task, drag it from the planner back into the Unassigned tasks list.
4 Drag to adjust
You can drag an assigned task to a different timeslot (in the same row or another team's). This will change its Estimated Start Time to the indicated value. Additionally, you can drag the right edge of the block to set its Estimated End Time accordingly.
5 Menu actions
To perform an action, select Menu and choose one of the following:
-
Change resolution - decrease or increase the time intervals. Values range from Quarter hourly to Weekly.
-
Filter tasks - use the AQS Builder to filter the tasks shown, e.g. only show tasks of a specific design/interface, only show tasks with a Raised Time greater than 2 weeks ago.
-
Filter teams - use the AQS Builder to filter the teams shown, e.g. only show teams whose Team Name contains "lighting".
-
Jump to date - reload the planner at the chosen date.
-
Save - commit any unsaved changes (indicated at the top). To leave without saving, select in the top-right corner.