Asset components
Manage your assets at the component level
If some of your assets are made up of distinct component parts, it's important to keep track of them too!
You can manage and maintain component parts in the same way as regular assets, helping you to maximise performance and reliability across your inventory.
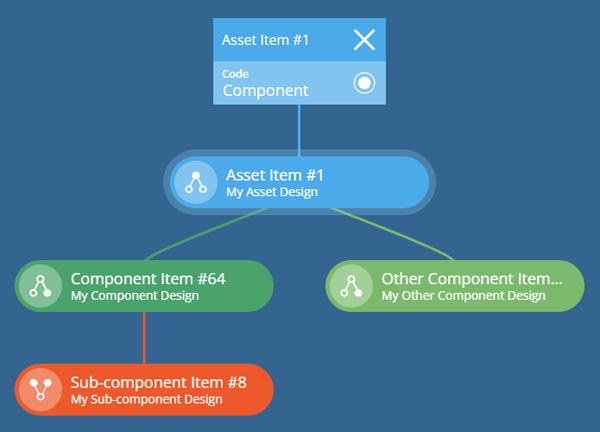
Assets and components can be linked together in parent/child relationships. These can be visualised using item graphs, making it easy to browse connected items and add/remove components as needed.
Represent your components with designs and items
To get started, create designs for each of your component types, and then add corresponding Link attributes on any design that needs to reference them.
You can then create items from your component designs and link them to parent items (assets or other components).
Create a component design
To create a design that represents a type of component:
-
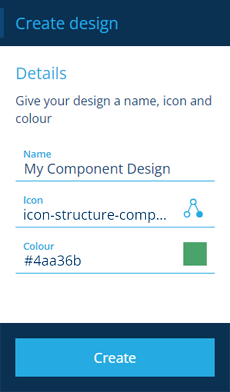
Open the Designer dashboard card, select Create design and choose Component.
-
Fill in the following fields:
-
Name * - supply a meaningful name to identify the design.
-
Icon - use the icon picker to choose an icon from the library. The default is .
-
Colour - use the colour picker to choose a colour from the library. The default is green.
-
-
Select Create. Your new design will appear in the right panel. Add custom attributes for each bit of information you want to record about the component type. For more customisation, see Designer.
Link other designs to the component design
For each design that needs to reference the new component type:
-
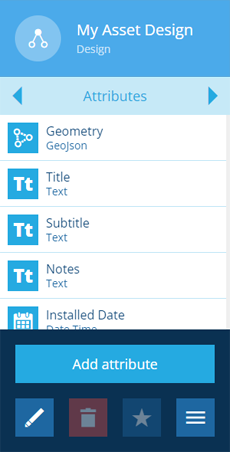
Select the design to view its details in the right panel.
-
Use the tab bar to switch to the Attributes tab.
-
Select More in the action bar and choose Add attribute.
-
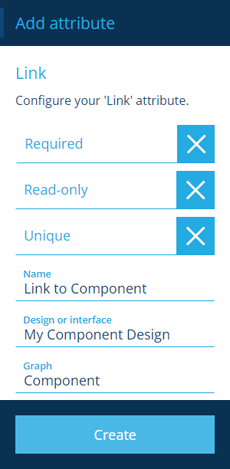
In the dashboard panel, choose the Link type.
-
Fill in at least the following fields and then select Create:
-
Name * - supply a meaningful name to identify the new attribute.
-
Design or interface * - choose the relevant component's design.
-
Graph * - choose the Component graph.
To learn about the other fields, see Link attribute.
-
To visualise links between designs and interfaces, see Design graphs.
Create component items
Once you have a design that describes a particular type of component, you can create items of that design to represent the components themselves. This involves entering values for the design's attributes.
To learn more, see Creating items.
Link a component item to a parent
To link a component item to a parent item (an asset or another component):
-
Select the component item to view its details in the right panel.
-
Use the tab bar to switch to the Parents tab.
-
Select More in the action bar and choose Add parent.
-
In the dashboard panel, select .
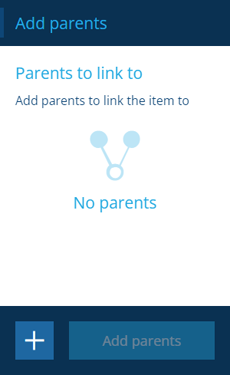
-
Fill in the following fields and then select Add:
-
Design * - select the design of the parent item.
-
Attribute * - if the parent design contains multiple possible Link attributes, choose one to add the component to.
-
Item * - select the parent item to add the component to.
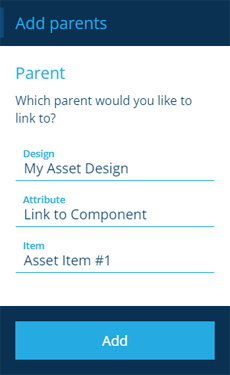
-
-
Select Add parents to finish.
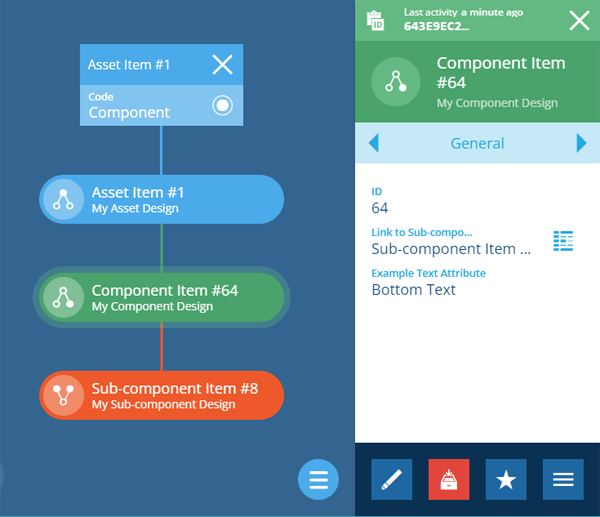
View an item's component graph
When viewing an item, a button appears above the map area, which you can select to view the item's graph.

Select a component item in the graph to view its details in the right panel, where you can edit or remove the item if needed.
Add a new component
To create a new component and link it to the selected item on the graph:
-
Select Menu (bottom-right) and choose Add item.
-
Choose a compatible Link attribute on the selected item. It will point to the new component.
-
If the chosen Link attribute applies to an interface, the designs that implement it are listed. Choose the design of the new component.
-
The Item creation process will appear in the dashboard panel with steps 1 and 4 completed. Select the remaining steps to enter any further information. Select Create to finish.