Number attribute
Store an integer or decimal number
A Number attribute can store a single number to any amount of decimal places.
Configuration
When adding or editing a Number attribute on a design/interface, you can configure the following properties:
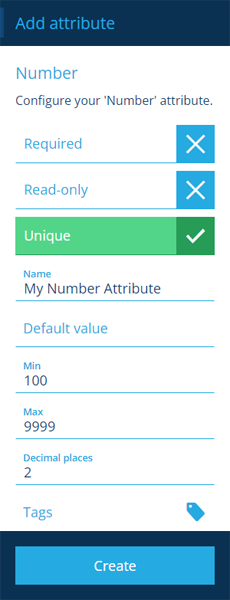
- Name * - enter a distinct name that clearly identifies the attribute.
- Code (read-only) - the attribute's Global Unique Code (Guc) identifier.
- Required - if enabled, the attribute must be populated before an item can be saved. It can't be left blank!
- Read-only - if enabled, the attribute can only be populated when creating items. It can't be edited afterwards!
- Unique - if enabled, the attribute only accepts values that aren't already stored in other items of the design/interface.
-
Default value - if set, the attribute will be automatically populated with this, unless another value is entered.
-
Min - the attribute won't accept a value smaller than this.
-
Max - the attribute won't accept a value larger than this.
-
Decimal places - enter the desired amount.
-
Tags - use the Tag Manager to assign custom tags or a relevant system tag.
Available system tags
Treat the attribute as:
-
Currency - an amount of local currency, determined by your company project.
-
Percentage - a decimal between 0 and 1.
-
Bytes - a size in bytes.
-
AutoIncrement - a number that increments automatically per item. See below for details.
-
RequiredOnTaskStatus[Completed/Cancelled] - only relevant if the design/interface implements the Tasks interface. The attribute becomes required when a task's status changes to Completed or Cancelled.
-
ActionParameter[Dynamic] - for internal use only. Marks the attribute as a configurable parameter on a workflow action.
-
Populate the attribute on items
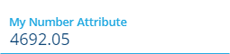
When creating or editing an item, select the attribute to type in or paste a numerical value.
Auto increment
A design may benefit from having an incrementing Number attribute, which is set automatically for each new item. This can be added as a variable in the design's title/subtitle for easy identification.
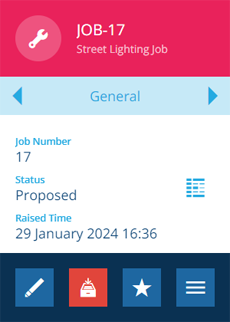
For example, all jobs have an automatic Job Number attribute inherited from the standard Jobs interface, which is displayed in each job item's title.
To enable this behaviour when adding or editing a Number attribute on a design/interface:
-
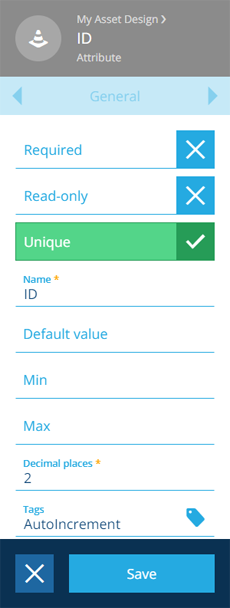
Select its Tags property and assign the AutoIncrement tag.
-
Enable Required and Unique to ensure no items can receive the same number.
-
Set Decimal places and Min to 0. Leave Default value and Max blank.
-
Select Save to finish.
Be aware, this attribute won't be visible when creating/editing an item because it's set automatically.
Existing items will receive the attribute when next edited (consider using a bulk action to Touch them). If an item already has the attribute with a positive number stored (e.g. from a data import), that value will remain untouched. Template items never receive a number.
How it works
When AutoIncrement is assigned to an attribute, an item of the Counters design is created, with its Number attribute set to 1. If that attribute is on an interface, every design that implements the interface shares the same counter.
During item creation, the AutoIncrement attribute is populated with the counter's number. The counter then always increments, even if item creation fails (e.g. due to lack of permission). This can result in numbers being skipped.
Counters can be edited. In the Data Explorer, you can query the Counters design, and then edit the relevant item's Number attribute (or delete the item to restart at 1).
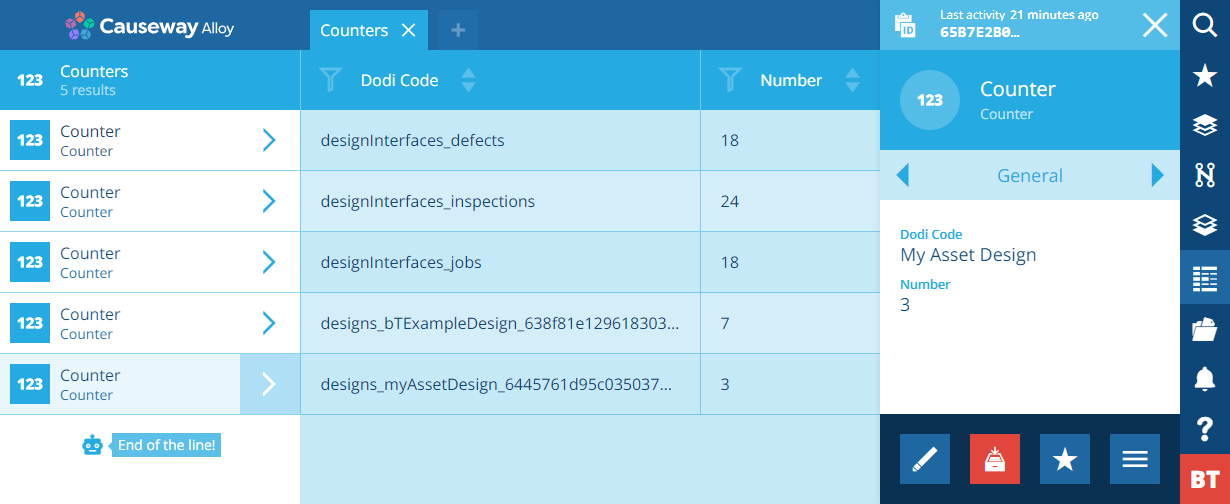
The Counters items for the Defects, Inspections and Jobs interfaces can't be edited.
If a counter is lowered, and the AutoIncrement attribute has Unique enabled, subsequent item creation may fail with an error (E1522096537: DodiAttributeUniqueViolated) due to clashing with existing items. However, repeated attempts will increment the counter each time, eventually reaching a unique number.