Geometry Collection
Allow multiple geometry types
This geometry type makes it possible to store a mixture of geometry types.
If a design/interface is configured to allow certain geometry types, only one type can be set when populating an item's geometry. However, if the allow list includes the Geometry Collection type, it's possible to set any combination of the other allowed types!
For example, if a design allows the "Point" and "Line" geometry types, you can only set one or the other. But if the "Geometry Collection" type is also allowed, you can set both "Point" and "Line" geometry on an item if you want to.
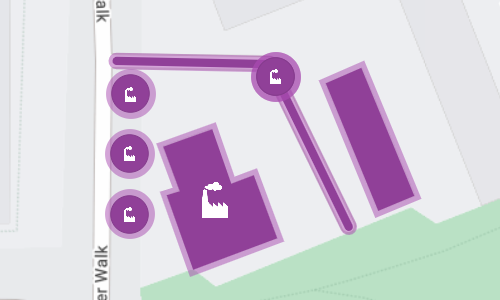
If Geometry Collection is the only allowed type, it won't be possible to populate items with any geometry!
How to draw
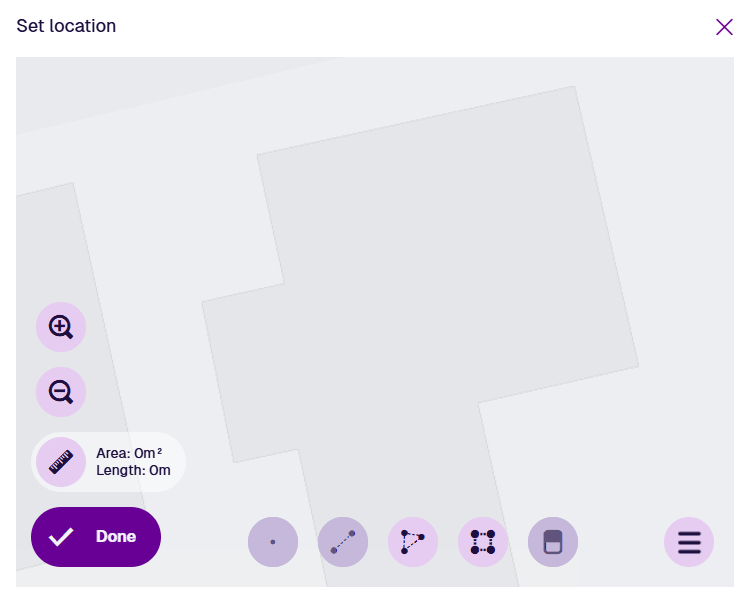
When you're editing item geometry, or another geometry data field, the Geometry Editor appears. The row of draw tools indicates which geometry types are allowed by the item's design (or the source of the field).
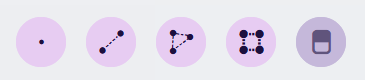
Use the draw tools to plot multiple types of geometry. If a tool appears dimmed, no additional geometry of that type can be added.
Point
Select the Point tool and then select your desired location on the map.
Once a point is selected, the Point tool becomes dimmed to indicate that no further points can be added. To reposition the point, drag it to another location, or use the Erase tool to remove it and start again.
Select Done to save your changes.
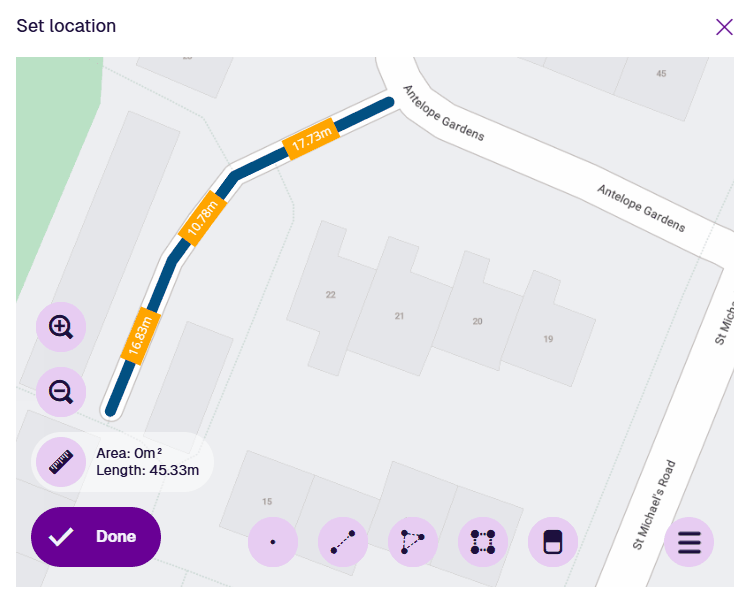
Line
Select the Line tool and then select a starting point on the map. Continue selecting points along your desired line. If you need to track a fine curve, select as many points as possible along it! To finish drawing, double-select the final point.
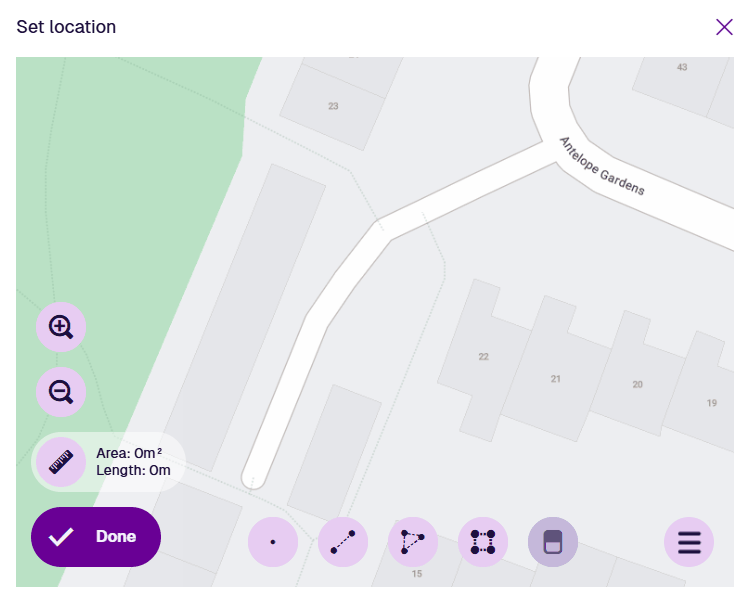
Once a line is finished, the Line tool becomes dimmed to indicate that no further lines can be added.
To edit the line, select an existing point (your mouse will snap to it) and drag it to a different position. To add a new point, select and hold anywhere along the line, and then drag the new point into position! Use the Erase tool to remove points as needed.
Select Done to save your changes.
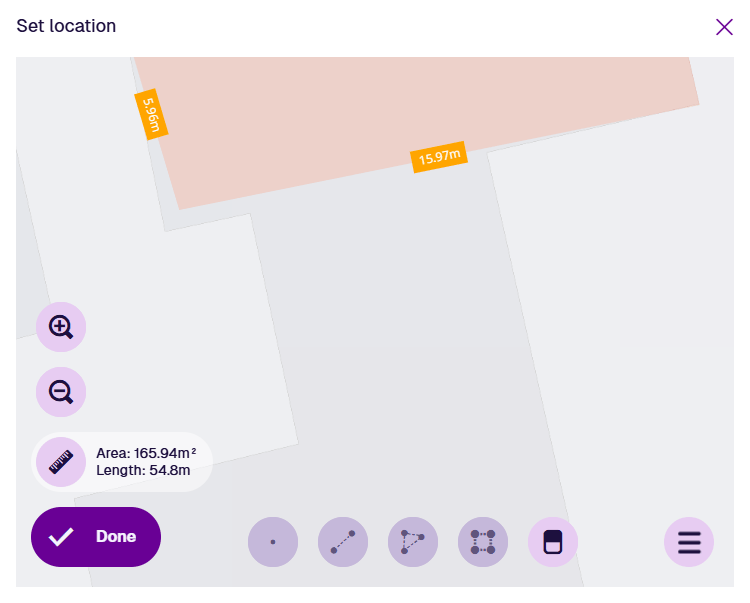
Polygon
Select the Polygon tool and then select a starting point on the map. Continue selecting points along your desired shape. If you need to track a fine curve, select as many points as possible along it! To finish drawing, double-select the last point (or select the starting point again).
Alternatively, you can use the Box tool to draw a rectangle between two diagonal points.
Once a polygon is finished, the Polygon tool becomes dimmed to indicate that no further polygons can be added.
To edit the polygon, select an existing point (your mouse will snap to it) and drag it to a different position. To add a new point, select and hold anywhere along an edge, and then drag the new point into position! Use the Erase tool to remove points as needed.
Select Done to save your changes.
Example GeoJSON
To access the underlying code of the current geometry, select Menu in the Geometry Editor and choose GeoJson view.
{
  "type": "GeometryCollection",
  "geometries": [
    {
      "type": "MultiPoint",
      "coordinates": [
        [-1.511249, 52.279328],
        [-1.511247, 52.279406],
        [-1.511249, 52.279249]
      ]
    },
    {
      "type": "LineString",
      "coordinates": [
        [-1.511277, 52.279449],
        [-1.510952, 52.279445],
        [-1.510783, 52.279233]
      ]
    },
    {
      "type": "MultiPolygon",
      "coordinates": [
        [
          [
            [-1.511178, 52.279337],
            [-1.511074, 52.27936],
            [-1.511033, 52.279289],
            [-1.510985, 52.2793],
            [-1.510935, 52.279218],
            [-1.511114, 52.279177],
            [-1.51117, 52.279274],
            [-1.511143, 52.279279],
            [-1.511178, 52.279337]
          ]
        ],
        [
          [
            [-1.510832, 52.27942],
            [-1.510756, 52.27944],
            [-1.510643, 52.279273],
            [-1.51072, 52.279254],
            [-1.510832, 52.27942]
          ]
        ]
      ]
    }
  ]
}