Upload files
Store files in Asset Management
Your CausewayOne Asset Management subscription includes online file storage! You can upload most types of files to CausewayOne Asset Management. By default, these get stored in your user folder, which you can browse using the File Explorer. This is the first step to importing data using Gateway.
You can also attach files to individual items, so that they appear when viewing the item's details.
For security purposes, we block the same file extensions as Microsoft Outlook.
If you're unable to upload files, your user account may lack the required permissions.
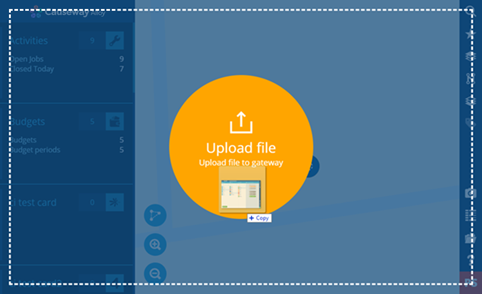
Upload via Drag and Drop
If you're accessing CausewayOne Asset Management from a Windows PC or Mac, this quick method lets you upload a file at any point:
-
Open a Windows Explorer (Mac: Finder) window and browse to your file.
-
Drag the file onto the CausewayOne Asset Management window and release it over the Upload file drop zone that appears.
A notification appears to indicate when the upload has succeeded or failed.
Upload via File Explorer
If you're unable to "drag and drop" a file, you can upload it via the File Explorer instead:
-
Select File Explorer in the right panel menu.
-
Select Menu (bottom-right) and choose Upload file .
-
Browse to the relevant file on your device and select it.
A notification appears to indicate when the upload has succeeded or failed.
The file will upload to your user folder (rather than the currently displayed folder) but you can move it afterwards. To learn more, see File Explorer.
Attach files to items
You can attach a file directly to an item! This is great for including item-specific supporting files (e.g. a photo of an asset's condition), which are easily discoverable when viewing the item's details.
To learn more, see Item attachments.