Importing NSG and NLPG files
How to import Gazetter data
NSG files contain street data. NLPG files contain land and premises data. When imported into CausewayOne Asset Management, the data is used to generate a network, providing a visual representation of the data for you to work with.
The following sections explain the five stages of performing a complete import.
Upload files
First, upload your data files to CausewayOne Asset Management. To do this quickly, drag them onto the web browser window and release over the drop zone that appears.
-
NSG data is stored across two CSV files labelled LG and AD respectively. Both are required for importing into CausewayOne Asset Management.
-
NLPG data can be stored in one or more CSV files. Files labelled Patch are incremental and can only build upon existing data. NLPG data is supplementary to NSG data, so it can only be imported if corresponding NSG data already exists in your company project.
Create the import
Next, create an import item and specify the file(s) to be imported:
-
Select the Gateway dashboard card and then Create import.
-
Choose NSG or NLPG. If either isn't shown, the relevant module needs enabling for your company project. Please contact your administrator or Causeway Support.
-
Fill in the following fields:
-
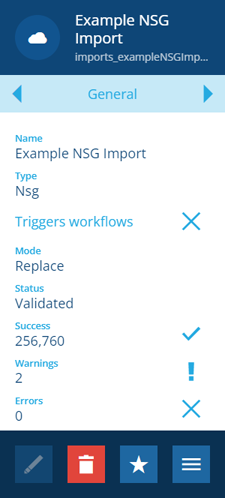
Name * - provide a distinct name that clearly identifies the import.
-
Files * - select the uploaded data file(s) you want to import.
-
Triggers workflows - disable this to prevent the create/edit actions of the import from triggering any event workflows.
-
Send email notifications - if enabled, you will be notified by email when the status of the import changes to Initialised, Validated, Processed or Failed.

-
-
Select Create to finish. Your new import item will appear in the right panel, with its Status set to Initialising.

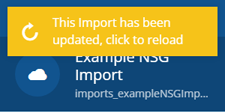
A notification appears when initialisation has finished. Select it to refresh the import's details.
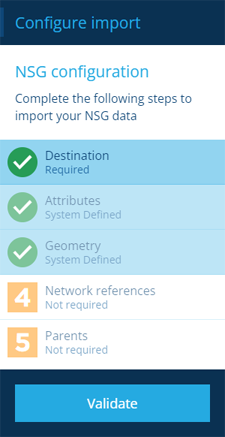
Configure the import
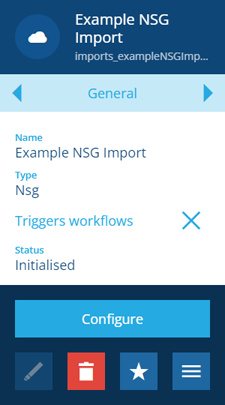
When the Status of your import item is Initialised, you can configure it:
-
Select the import to view its details in the right panel. Select More in the action bar and choose Configure.
-
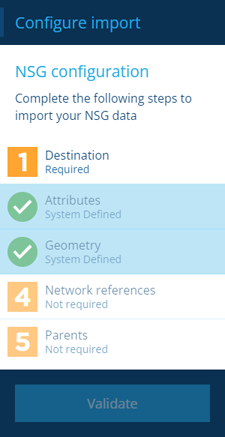
In the dashboard panel, select 1 Destination (all other steps are configured automatically).
-
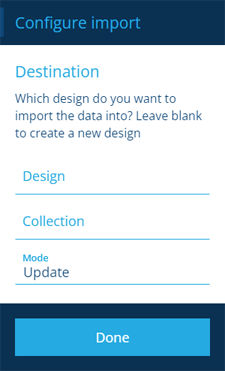
Fill in the following fields and then select Done to finish:
-
Design * - choose the NSG/NLPG design that you wish to update or replace the data on. Alternatively, for NSG imports only, you can choose to create a new NSG design instead. Leave this blank and set Mode to Replace.
-
Collection * - choose the collection that the created/edited items will belong to.
-
Mode * - choose one:
-
Update - existing items will be updated with imported values. New items will be created for new import data rows.
-
Replace - all existing items will be deleted. New items will be created for all import data rows.
-
ImportantReplace mode will delete all items of the chosen design and collection - including network references - before creating the new items. This is irreversible, so please double-check that you want to do this! We recommend contacting Support for advice before using this mode.
-
-
If you're importing NLPG data, there's an extra step to complete. Select 6 NSG to reference and then choose the existing NSG design that your NLPG data relates to.

Validate the import
-
To finish configuring your import, select Validate at the bottom of the dashboard panel.
A notification appears when validation has finished. Select it to refresh the import's details.
If the validation produced any Errors, you can study the log file for more detail and try again. See Reconfiguring an import.
Otherwise, you can proceed to commit the import (even if there are Warnings).
Commit the import
Once the import has been configured and validated, you can commit the data changes to CausewayOne Asset Management. Select the import to view its details in the right panel. Select More in the action bar and choose Commit.
A notification appears when the commit has finished. Select it to refresh the import's details.