Importing shapefiles
How to import a set of shapefiles
Shapefile is a geospatial vector data format used in geographic information system (GIS) software. It can define points, lines and polygons to spatially describe features, e.g. water wells, rivers, lakes. Features can also have data attributes that provide extra information about them.
The following sections explain the four stages of performing a complete shapefile import.
Upload shapefiles
First, upload your data files to CausewayOne Asset Management. To do this quickly, drag them onto the web browser window and release over the drop zone that appears.
Shapefile data is spread across multiple file types, some of which are optional. The following file types are required for import:
.shp— the main shape file, which stores the feature geometry itself..shx— the shape index file, which stores the positional index of the feature geometry..dbf— the dBASE table file, which stores attribute data columns for each shape.
There is a one-to-one relationship between feature geometry and attributes, which is based on record number. Attribute records in the dBASE file must therefore be in the same order as records in the main shape file.
Create a shapefile import
Next, create an import item and specify the file(s) to be imported:
-
Select the Gateway dashboard card and then Create import.
-
Choose the Custom import type.
-
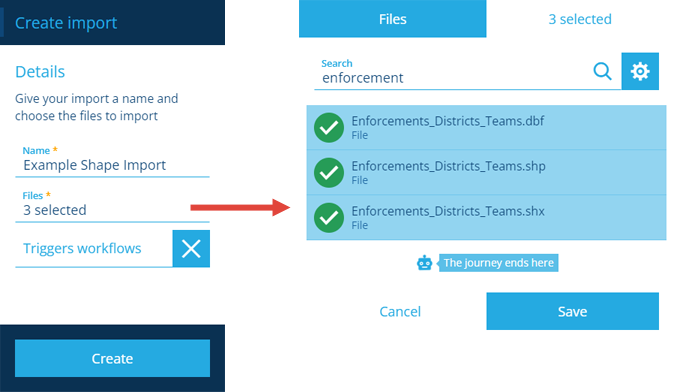
Fill in the following fields:
-
Name * - provide a distinct name that clearly identifies the import.
-
Files * - select all three of your uploaded shapefiles.
-
Triggers workflows - disable this to prevent the create/edit actions of the import from triggering any event workflows.
-
Send email notifications - if enabled, you will be notified by email when the status of the import changes to Initialised, Validated, Processed or Failed.
-
-
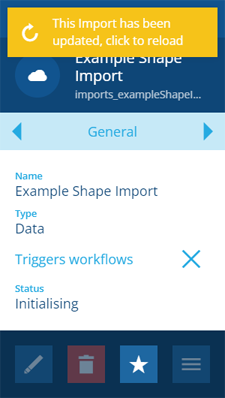
Select Create to finish. Your new import item will appear in the right panel, with its Status set to Initialising. A notification appears when initialisation has finished. Select it to refresh the import's details.
Configure the import
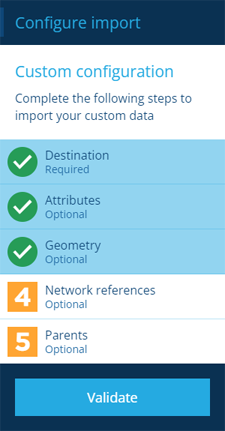
Once the new import item's Status has changed to Initialised, you can configure it the same way as any other import. The 4 Network references and 5 Parents steps aren't usually required to configure a shapefile import.
To learn more, see Configuring an import.
Commit the import
Once the import item's Status as been configured and successfully validated without any errors, you can commit its data to your company project.
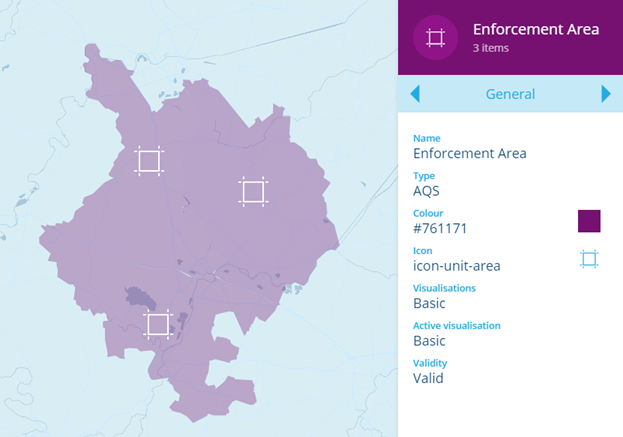
To visualise the imported items' geometry on the map, you can create a new layer. When configuring the layer's style, make sure that its Active visualisation is set to Basic to view the shapes correctly.