Cloning items
Create an exact copy or make changes
Cloning items provides a quick way to create multiple items with similar settings.
During the item clone process, you have the ability to override any copied properties/attributes, and customise the degree to which linked items are cloned too.
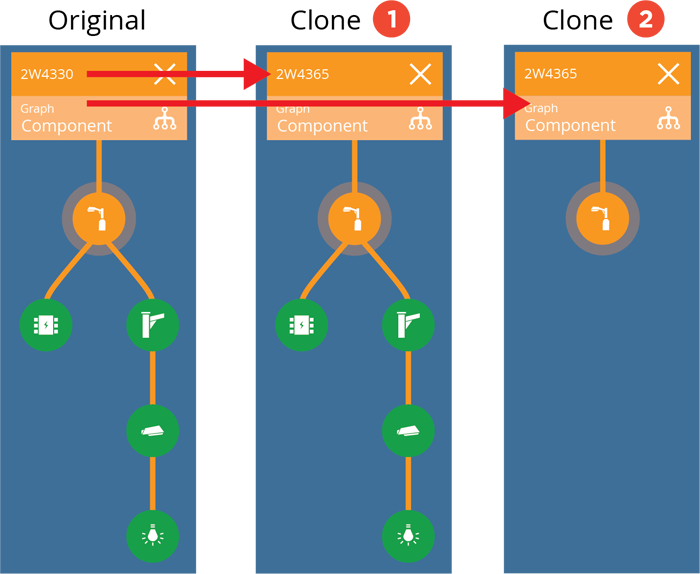
For example, the item below is linked to several components, directly and indirectly. When cloning the original item, you can keep linking to the same components, or clone the components too, or ignore them completely.
Start the process
To start cloning an item, select the item to view its details, select More in the action bar and choose Clone item.
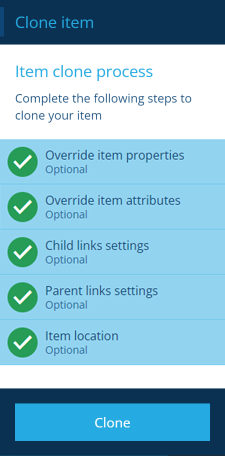
The item clone process
The key steps of this process will appear in the dashboard panel:
-
1 Override item properties - optional
-
2 Override item attributes - optional
-
3 Child links settings - optional
-
4 Parent links settings - optional
-
5 Item location - optional
The steps will already be marked as complete, as they're pre-populated with the original item's values (except step 2 which requires adding attributes to override them).
Therefore, immediately selecting Clone will create an exact copy of the original item, including clones of any linked components (but not activities). Each clone will have a unique Item ID but otherwise be identical to the original.
Alternatively, select any of the steps to customise the clone.
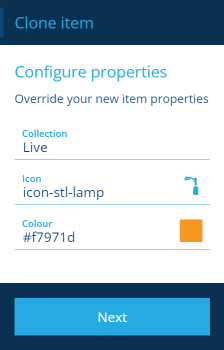
1 Override item properties
These values are copied from the original item's properties. Select a property to override it with a new value. If the original item is a template, the clone will be created in the Live collection by default.
Select Next to choose the next step.
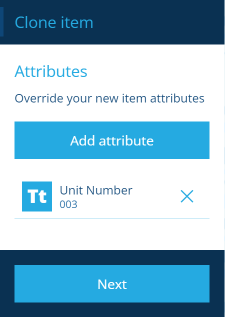
2 Override item attributes
By default, all attribute values are copied from the original item.
To override a particular attribute, select Add attribute and choose it from the list. Provide a new value or select Unset to clear the current one. Repeat for each attribute you want to override.
Select Next to choose the next step.
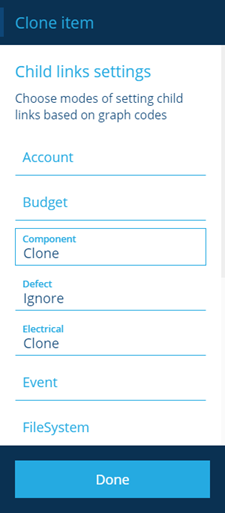
3 Child links settings
By default, the clone will link to the same child items as the original. If any child items are templates, the clone will link to clones of them instead. However, you can selectively override this behaviour as needed.
Each Link attribute on the original item has a Graph property, which determines the graph type that its linked items appear on. For each graph type, you can specify what happens to the Link Attributes that use it (some are pre-populated with suggestions):
-
Ignore - the Link attributes will be cleared, so they'll contain no linked items on the clone.
-
Keep - the Link attributes will continue linking to the same items as the original.
-
Clone - the Link attributes will link to clones of the originally linked items.
Select Next to choose the next step.
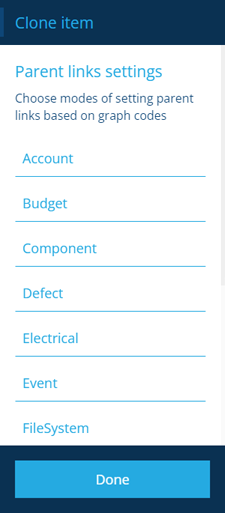
4 Parent links settings
There may be parent items that link to the original item (it appears in their Link attributes). By default, parent items won't link to the clone, unless the original item is a template (and the parents themselves are not).
However, you can selectively override this behaviour as needed. Like the previous step, this is set per graph type, but on the parent items instead:
-
Ignore - the Link attributes of parent items won't link to the clone.
-
Keep - the Link attribute of parent items will link to the clone.
Select Next to choose the next step.
5 Item location
By default, the clone will use the same geometry as the original item (if it has any). To override this, select Set location to open the Geometry Editor and use it to draw a point, line or polygon on the map.
Select Next to continue.
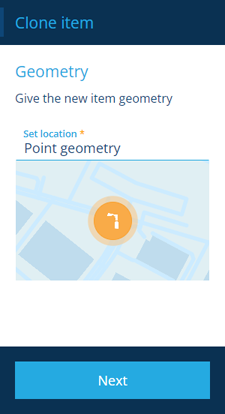
This step will appear dimmed and unavailable if the original item's design doesn't allow geometry.
Finish the process
After completing the relevant steps for your item, select Clone to finish. A notification indicates whether the item was created successfully or an error occurred.
Scheduled cloning
You can create a schedule that automatically clones an item on certain dates or at repeated intervals. This is particularly useful for activity items, e.g. clone an inspection item for a particular asset every month.
To learn more, see Schedules.