Constant data source
Types of fixed value
There are several types of constant data source. They all represent a manually entered value, which can be populated by a user when they run the report.
Constant data sources can be used as query parameters within AQS and AQS statistics data sources, so they provide a handy way for users to customise the output of a report.
For example, imagine a custom report about defects. There are various possible ways to filter and sort those defects (e.g. by area, by status, by date). By including several constant data sources that take user input, and configuring an AQS data source to use them as parameters, the user can tailor the report to their requirements.
Create a constant data source
To create a constant data source in the Report Builder:
-
Open the Data sources tab and select Create data source.
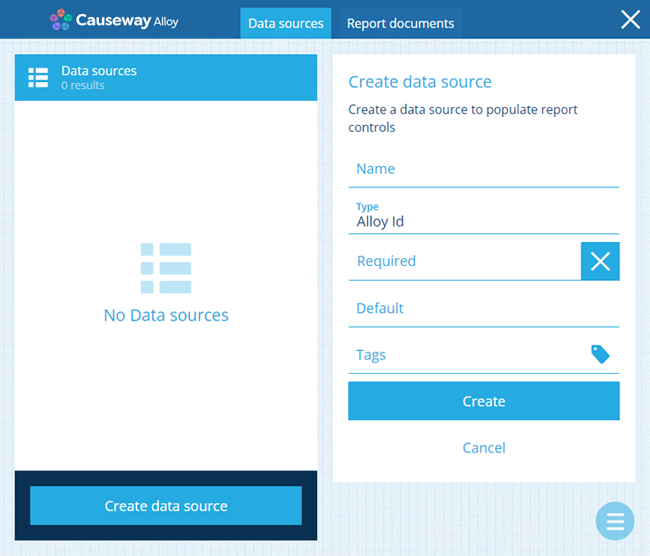
-
Supply a distinct Name. Users see this when running the report, so make sure it describes the data source clearly. To ensure the data source is always populated when running the report, enable Required.
-
Select Type and choose one of the following:
Type Description Example Input Method Alloy Id Represents an Item ID value 5f86c84e2bdc0600696cddb7 Type into the field Date Represents a date value 11 May 2022 Select a value with the calendar picker Date Time Represents a date and time value 2 July 2022 13:30:00 Select a value with the calendar picker Geometry Represents geometry coordinates in GeoJSON format 
Draw points, lines or polygons using the Geometry Editor Number Represents a number value 314 Type into the field Seasonal Represents a seasonal value (a date without a year) 25th December Select a value with the calendar picker Text Represents a text value Hello world! Type into the field Time Represents a time value 14:20:00 Select a value with the calendar picker Yes/No Represents a boolean value Yes or No Choose an option -
Consider setting an appropriate Default value if possible. This helps to ensure your report always runs successfully. Users can still change the value when running the report.
-
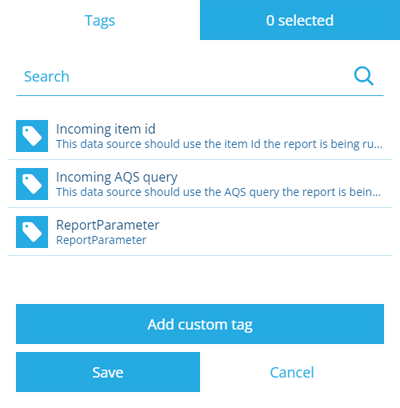
If Type is set to Alloy Id and your report is intended to be run from an item, the data source can be populated automatically with that item's ID. Select the Tags field, set the Incoming item id tag and select Save.
Details
-
Select Create to finish.
Customise sorting and headers
To configure these optional fields, edit the data source after creating it:
-
Sorting - specify how the data should be sorted. See Data source sorting.
-
Headers - retitle selected headers for easier identification. See Data source headers.
Use as a query parameter
For information about using a constant data source as a query parameter, see: