Item data source
The attribute data of a single item
An Item data source represents the attribute data of a single item of a particular design/interface.
It can be thought of as a table with a single row and the selected attribute as column headers.
To fetch attribute data from multiple items, see the AQS data source.
Create an Item data source
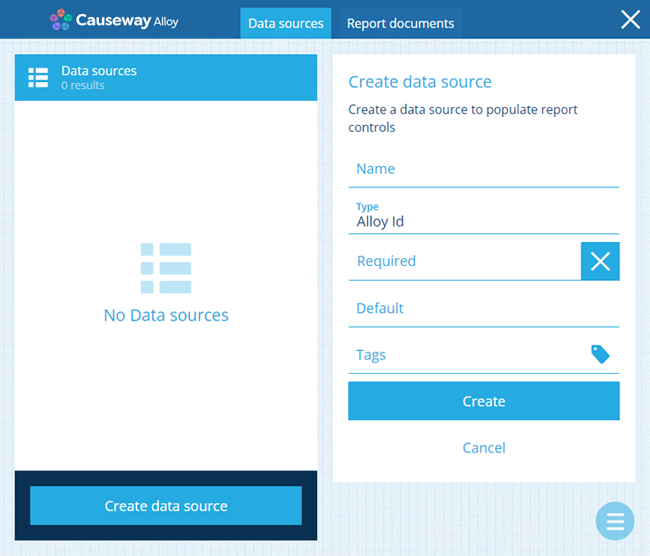
To create an Item data source in the Report Builder:
-
Open the Data sources tab and select Create data source.
-
Supply a distinct Name. Users see this when running the report, so make sure it describes the data source clearly. To ensure the data source is always populated when running the report, enable Required.
-
Select Type and choose Item.
-
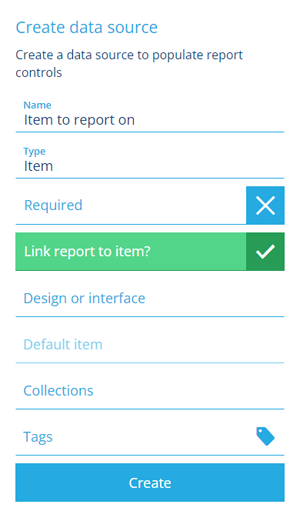
Fill in the remaining fields:
-
Link report to item? - if enabled, when the report is run, a link is automatically created from the generated report item (parent) to the data source's item (child). This makes the linked item discoverable from the report item and vice versa.
Details
When viewing the report item, the linked item will appear in the Items Reported On link on its General tab.
When viewing the linked item, the generated report item will appear on its Reports tab.
-
Design or interface - choose the design/interface to pick an item from.
-
Default item - we recommend setting an appropriate default item if possible. This helps to ensure your report will always run successfully. Users can still change the value when running the report.
-
Collections - select the collection(s) that can be searched when picking the item. The list shown depends on the chosen design/interface. By default, only the Live collection is searched.
-
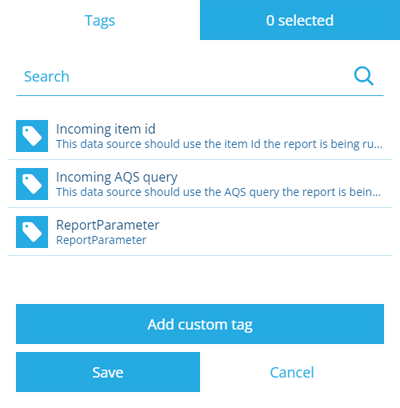
Tags - if your report is intended to be run from an item, the data source can be populated automatically with that item. Select this field and set the Incoming item id tag.
Details
-
-
Select Create to finish.
Customise sorting and headers
To configure these optional fields, edit the data source after creating it:
-
Sorting - specify how the data should be sorted. See Data source sorting.
-
Headers - retitle selected headers for easier identification. See Data source headers.