Using controls within a Repeater
How to use nested Repeater controls
When you're editing a flow document, adding a Repeater control lets you repeat a set of child controls for each item fetched by an AQS data source.
But why stop there? By adding a Repeater to a Repeater, you can display multiple levels of connected data!
This is perfect for scenarios involving data with one-to-many relationships, such as a Join data source that combines data from other data sources.
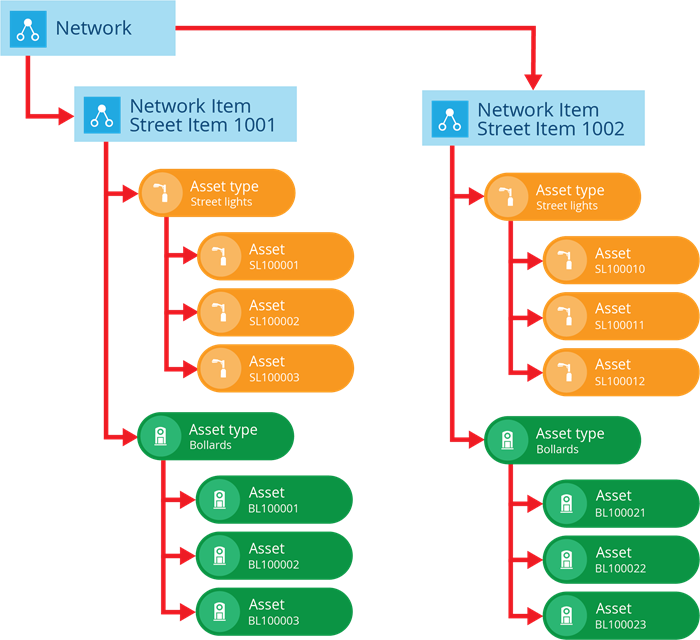
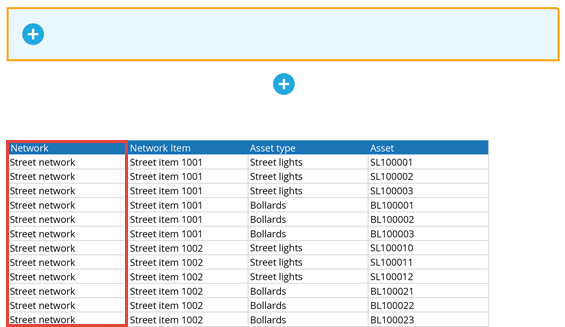
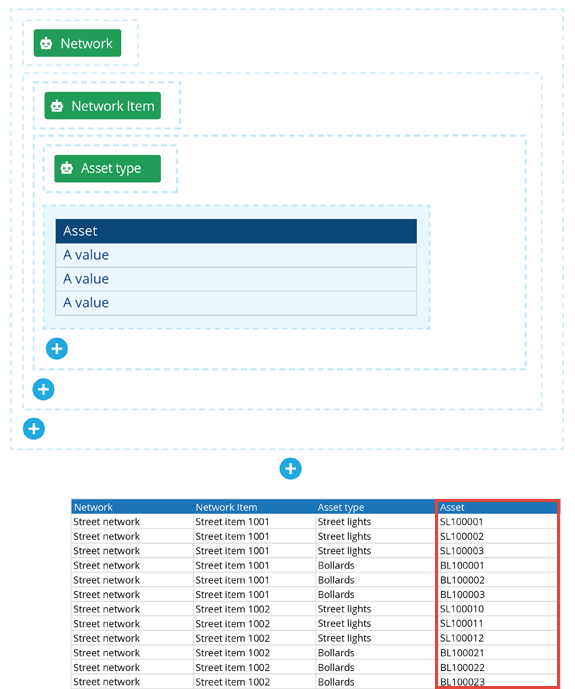
Example scenario
In the example scenario illustrated below, the Network has multiple Network Items (Streets), each Network Item can have multiple Asset types (Street lights, Bollards), and each Asset type can have multiple Assets.
Sample data in table format
A sample data source for the above scenario, outputted as a table.
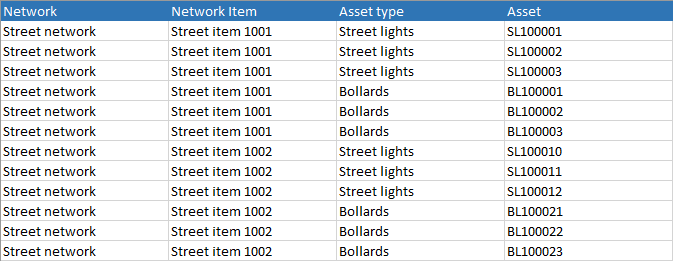
There's a lot of repeated data! Through the use of nested Repeater controls, you can remove the repeated data and group the remaining data in a meaningful way.
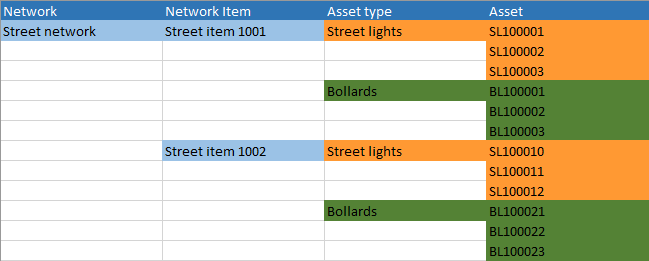
Sample data in a formatted report
A sample data source for the above scenario, outputted using nested Repeater controls in a report document.
Demonstration
The rest of this article demonstrates the steps taken to produce the sample formatted report illustrated above. As your company project may not contain the same designs used in the example scenario, please understand that this is a general guide to show what's possible and needn't be followed verbatim!
Add the first Repeater
First, we add a Repeater control to the layout:
-
In the Document Layout Editor, select Add at the bottom of the layout and choose Repeater.
-
With the Repeater selected, set the following properties in the toolbar:
-
Data source - set this to the data source containing the data you wish to repeat on. For this demonstration, we're using our Network Street lights data source (mentioned above).
-
Header to repeat on - set this to the Network header. The child controls of this Repeater will be repeated for each value in this column.
-
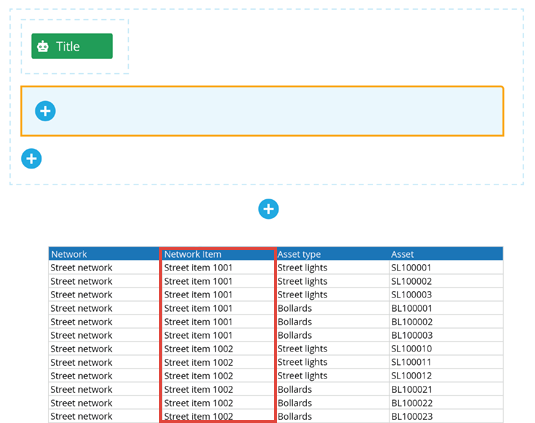
Add a Text control to the first Repeater
We create the first heading by adding a Text control to the first Repeater:
-
Select Add within the first Repeater and choose Text.
-
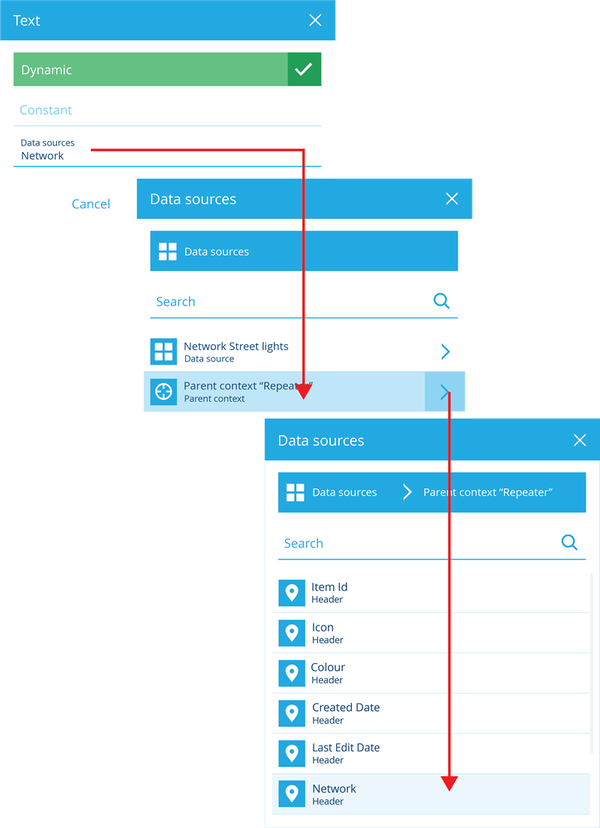
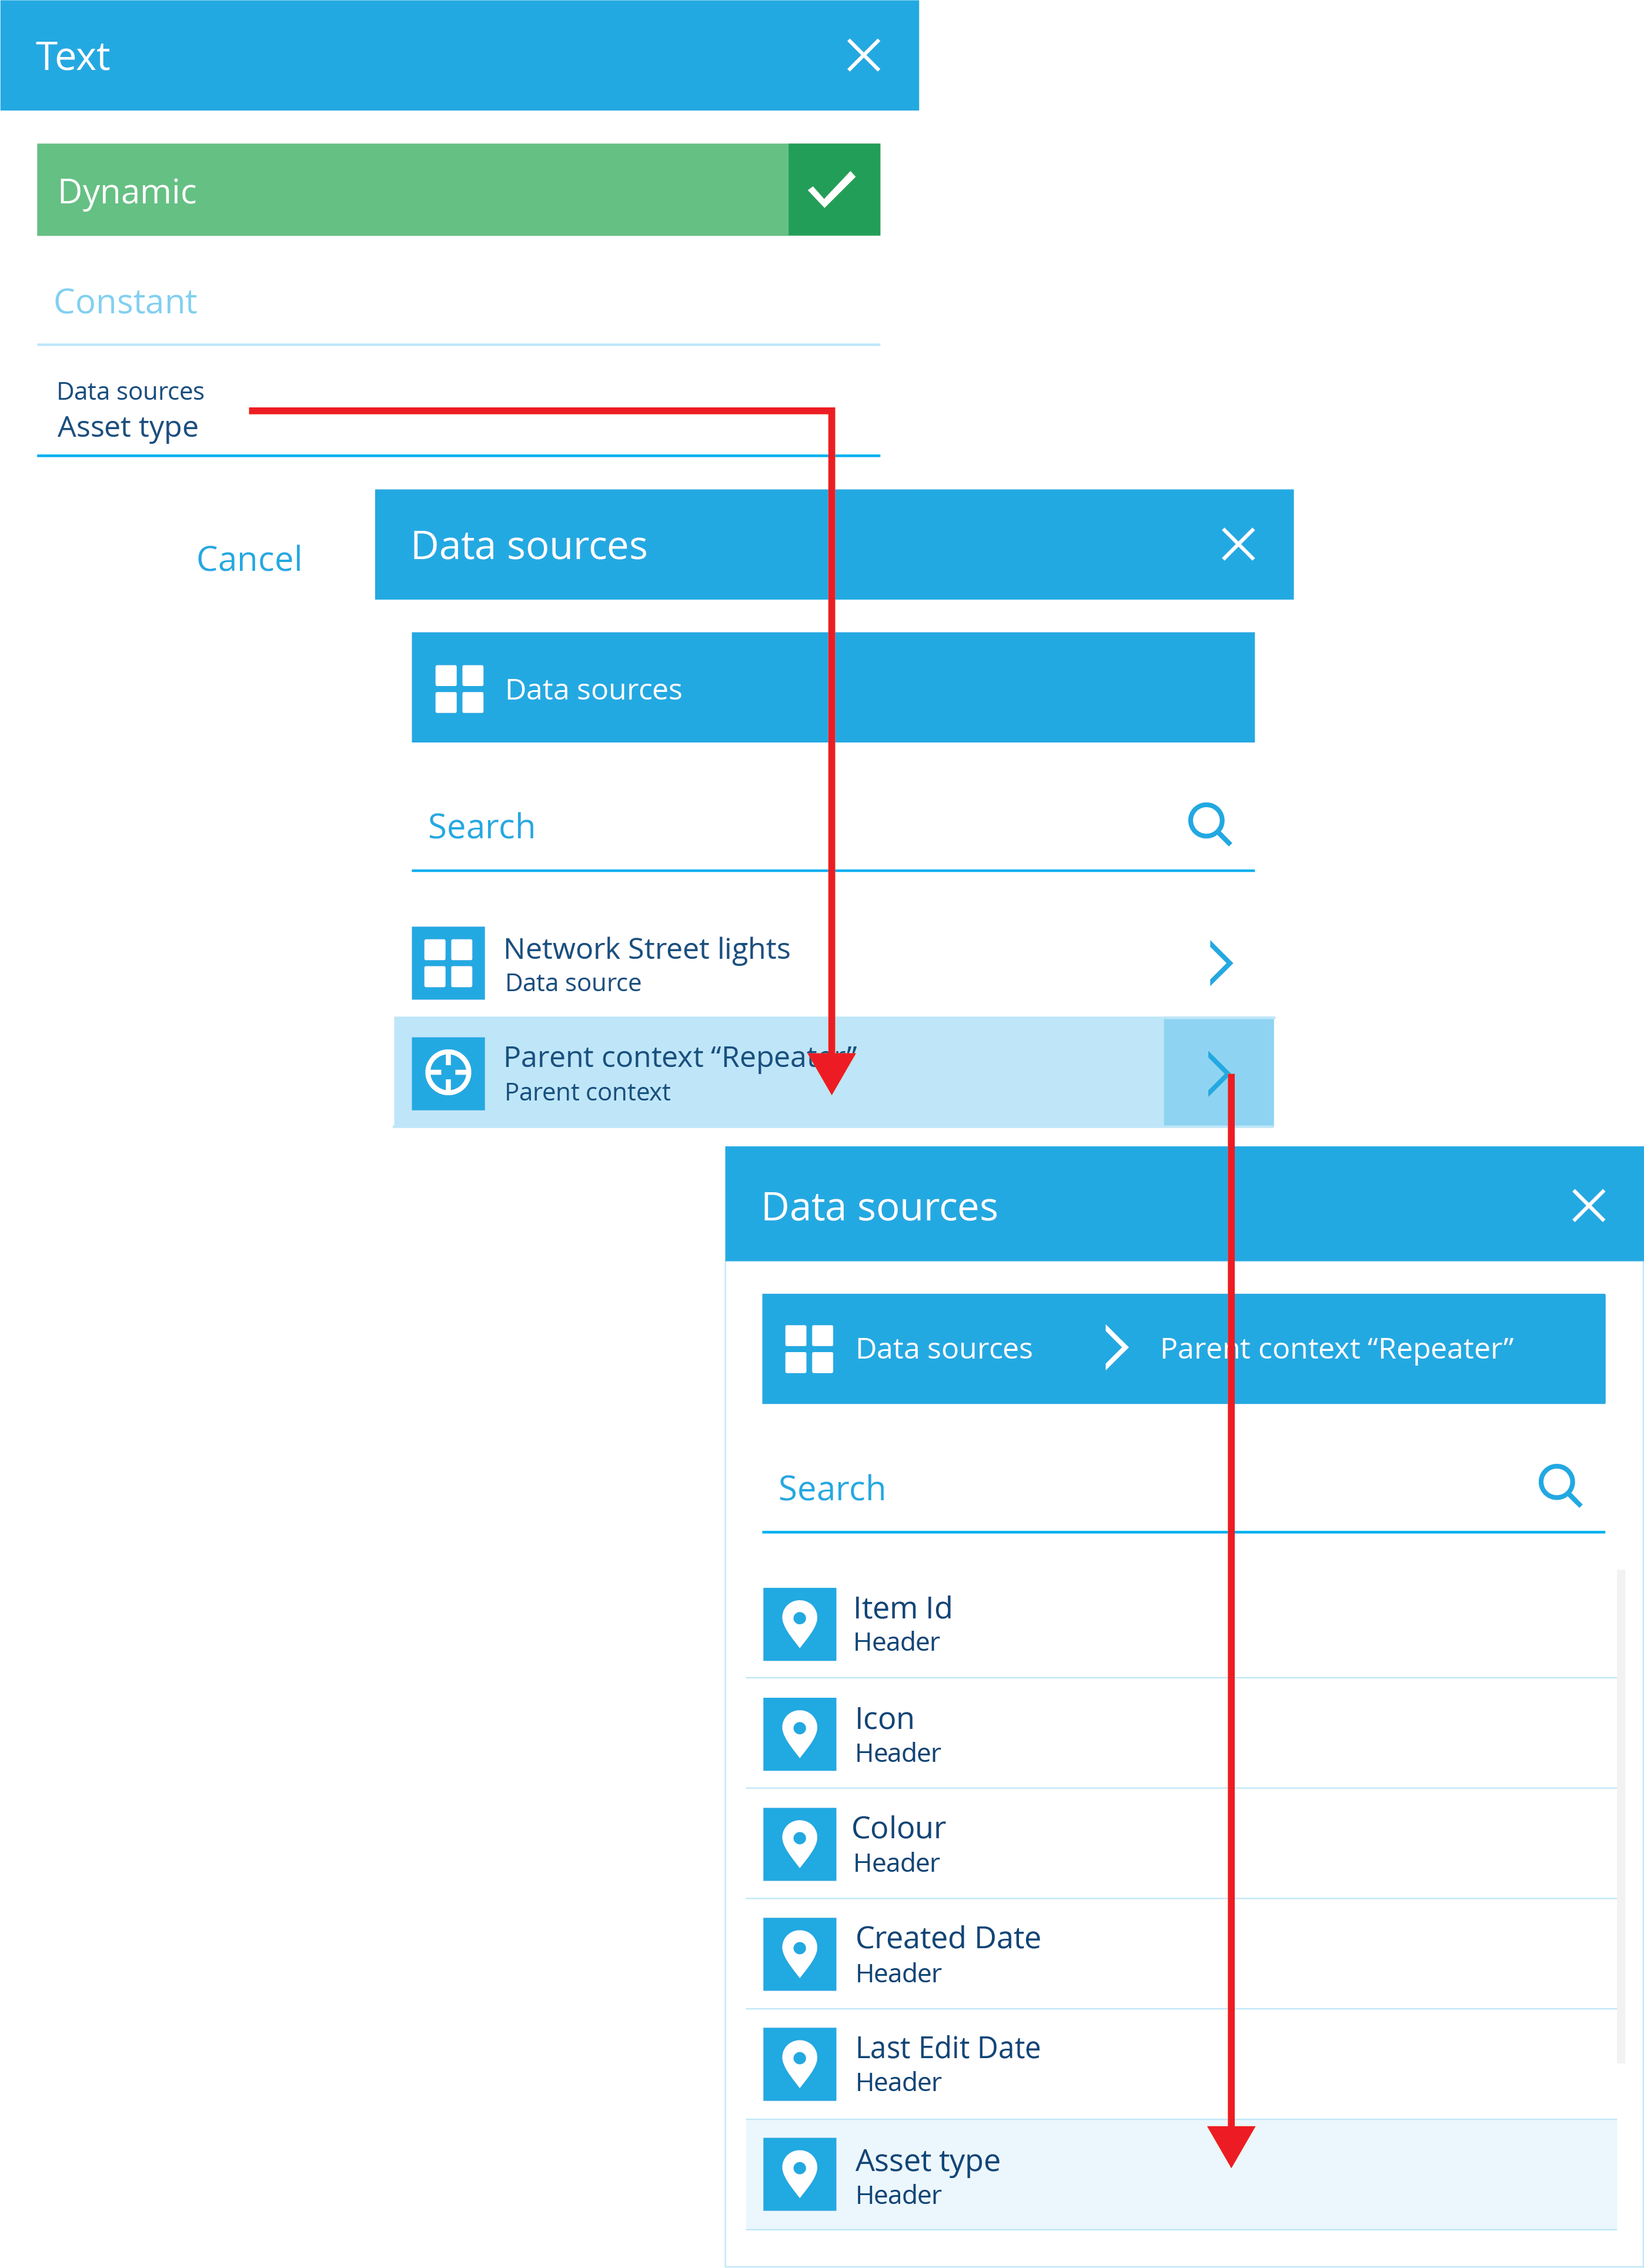
To set the value of the Text control, select the pill shape within it.
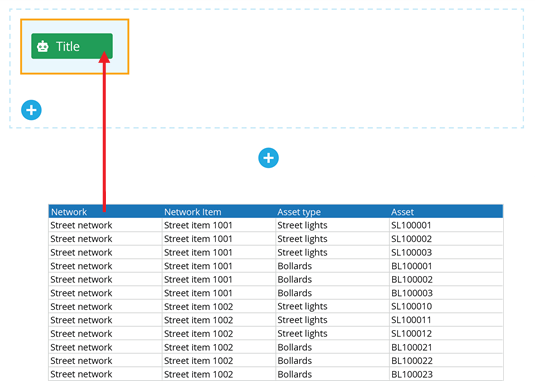
-
Enable Dynamic, choose the Parent context data source, and then select the Network header.
See screenshot
Add the second Repeater
To group the remaining data by Network Item, we need to add a second Repeater within the first:
-
Select Add within the first Repeater and choose Repeater.
-
With the second Repeater selected, set the following properties in the toolbar:
-
Data Source - set this to the Parent context data source. If we select the Network Street lights data source directly, it'll stop the first Repeater from working!
-
Header to repeat on - set this to the Network Item header. The child controls of this second Repeater will be repeated for each value in this column.
-
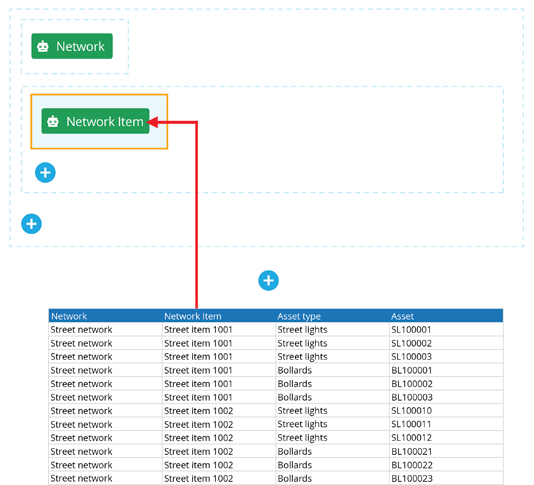
Add a Text control to the second Repeater
We create the second heading by adding a Text control to the second Repeater:
-
Select Add within the first Repeater and choose Text.
-
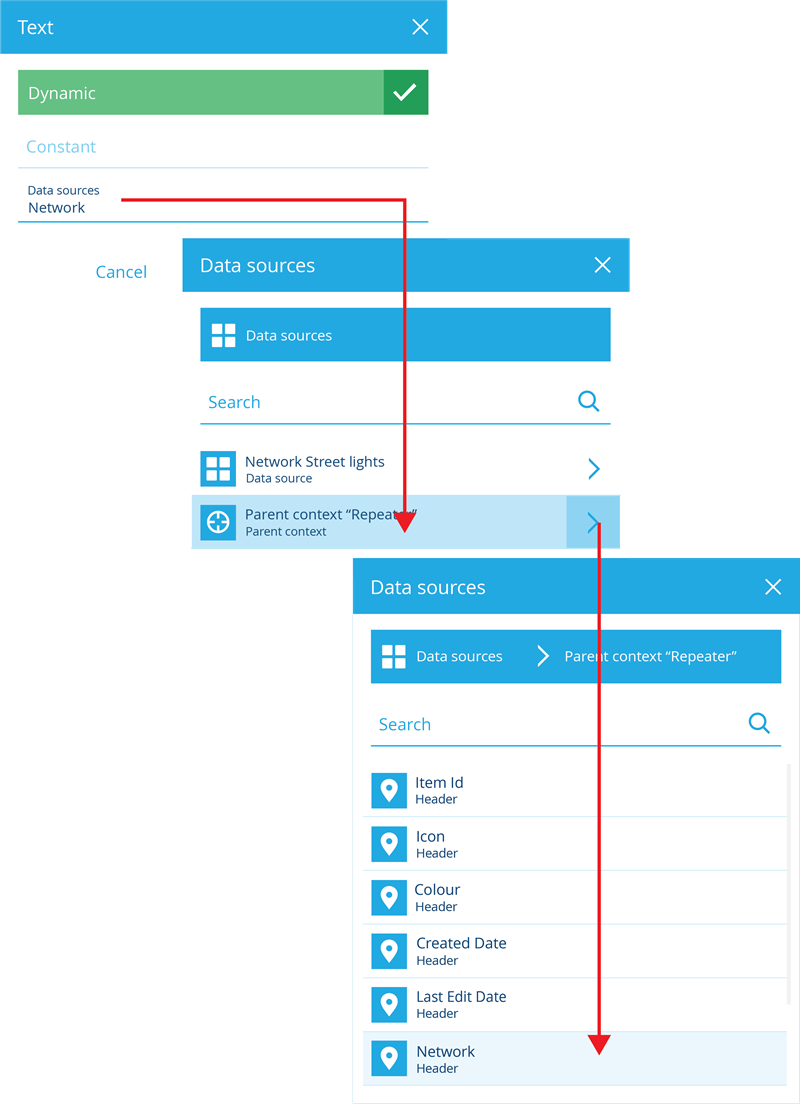
To set the value of the Text control, select the pill shape within it.
-
Enable Dynamic, choose the Parent context data source, and then select the Network Item header.
See screenshot

Add the third Repeater
To group the remaining data by Asset Type, we need to add a third Repeater within the second:
-
Select Add within the second Repeater and choose Repeater.
-
With the second Repeater selected, set the following properties in the toolbar:
-
Data Source - set this to the Parent context data source. If we select the Network Street lights data source directly, it'll stop the second Repeater from working!
-
Header to repeat on - set this to the Asset type header. The child controls of this third Repeater will be repeated for each value in this column.
-

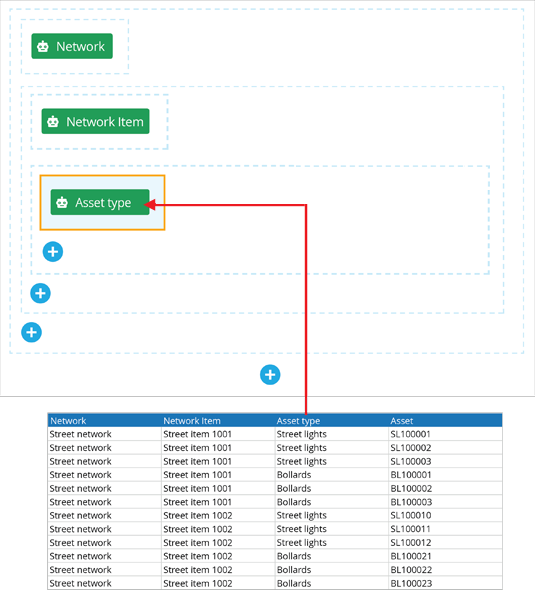
Add a Text control to the third Repeater
We create the third heading by adding a Text control to the third Repeater:
-
Select Add within the third Repeater and choose Text.
-
To set the value of the Text control, select the pill shape within it.
-
Enable Dynamic, choose the Parent context data source, and then select the Asset type header.
See screenshot

Add a Table control to the third Repeater
Finally, we list the Asset items by adding a Table control to the third Repeater:
-
Select Add within the third Repeater and choose Table.
-
With the Table control selected, set the following properties in the toolbar:
-
Data Source - set this to the Parent context data source. If we select the Network Street lights data source directly, it'll stop the third Repeater from working!
-
Headers - ensure only the Asset header is selected, as that's the only column we want in our table.
-
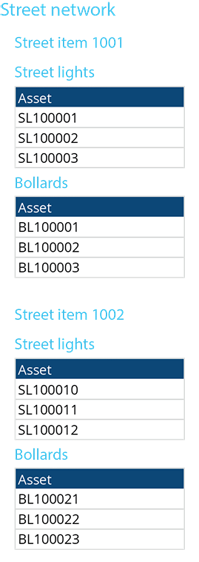
Demonstration Output
Here again is the formatted output of our demonstration after running the report.