Tags
Use tags to identify and group things
In many areas of CausewayOne Asset Management, you have the ability to mark things with tags.
A tag is a keyword or phrase that typically describes a category or shared characteristic, e.g. Lighting assets, Highways Department, Zone D, Mobile only.
By creating a tag and assigning it to multiple objects, you can define a relationship between them while still keeping them separate. An object can have multiple tags, so it's possible to create many overlapping relationships without conflict.
Tags are great for filtering a list or making objects easier to find during a search.
Some system tags are available to use in relevant situations. These can affect how an object is treated or acted upon (examples below).
Where can I use tags?
You can use tags when creating/editing the following objects:
-
Attributes - system tags are available depending on the attribute type, e.g. a Number attribute can be tagged as Currency or Percentage.
-
Item forms - tags determine the scenarios where an item form is used, so at least one is required! Select a system tag or add your own.
-
Layers - if you categorise your layers with custom tags, you can easily filter the Layers panel to show only relevant layers when needed.
-
Report data sources - system tags are available that affect behaviour, e.g. by assigning the Incoming item id tag to an Item data source, if a user runs the report when viewing an item, the data source will use that item's ID by default.
Using the Tag Manager
To assign tags to an object that you're creating/editing:
-
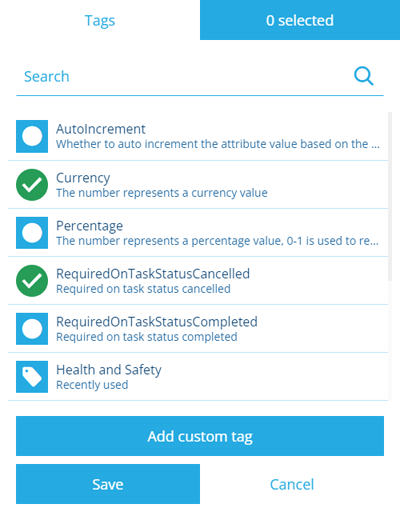
Select the object's Tags field to show the Tag Manager.

-
The Tag Manager lists any system tags that are relevant to what you're doing, along with any recently used custom tags. Select the tag(s) you want.
-
To create a new tag, select Add custom tag, enter your text, then select Add. The new tag will be visible to everyone in your company project.
-
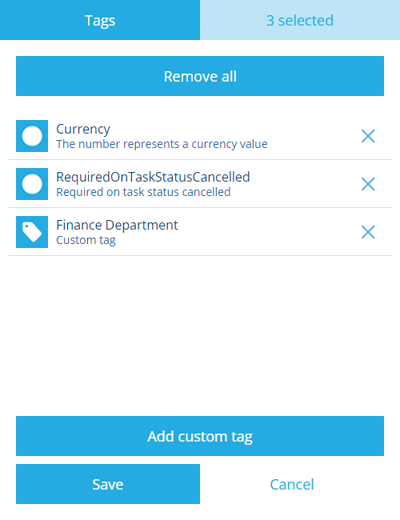
To see the currently selected tags, select X selected (top-right). To deselect tags, select their or use the Remove all button.
-
Select Save to finish.