Dynamic action values
Link to values in other nodes
When building a workflow, some actions have attributes that can be configured with a dynamic value, which is determined when the workflow runs. This can be the output of another node in the workflow sequence, or a computed date/time relative to the time of execution.
You can set a dynamic value for any action attribute marked with a link icon.

When you select the field, a window will appear. Switch to the desired tab depending on what you want to do. Fill out the fields as needed, then select Save to finish.
To understand how items get passed between actions, see Inputs and outputs.
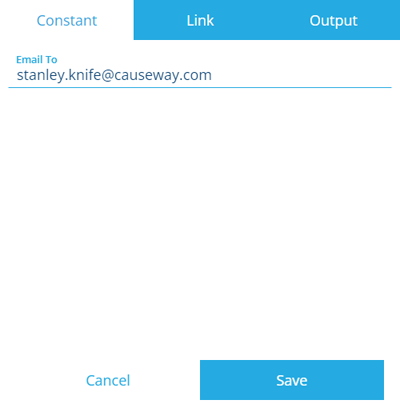
Constant
The Constant tab lets you enter a non-dynamic value, just like you would normally. Depending on the data type, you can write directly into the field, or select a value using a picker.
Offset
The Offset tab only appears when setting the value of a Date, Date Time or Time attribute within a Create Item or Edit Item action.
It lets you set a date/time value relative to when the workflow was triggered. This is particularly useful when configuring activity items, which typically contain several attributes of these types.
For example, imagine an event workflow that creates a pre-populated inspection when a new defect is created. It sets the inspection's Target Time attribute to 9 working days after the new defect was created (and the workflow was triggered).
To record the immediate date/time, set the lowest available unit to 0.
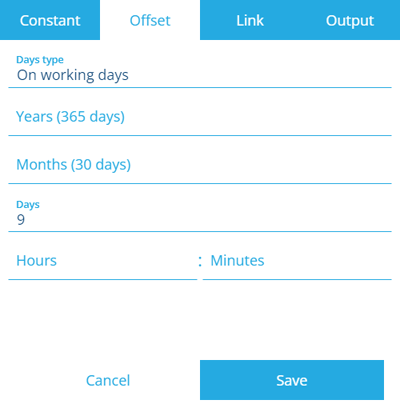
The Days type field can be set to:
-
On working days
-
On non-working days
-
Both (default)
To configure the working days for your organisation, see Working days and holidays.
The following examples illustrate how the Days type field can affect the offset values you enter:
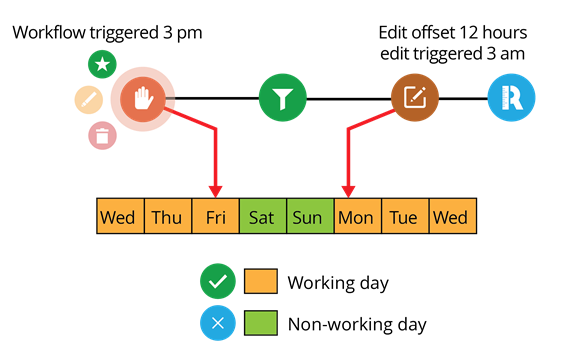
Example 1: An offset of 12 hours
Using On working days.
Using On non-working days.

Using Both.

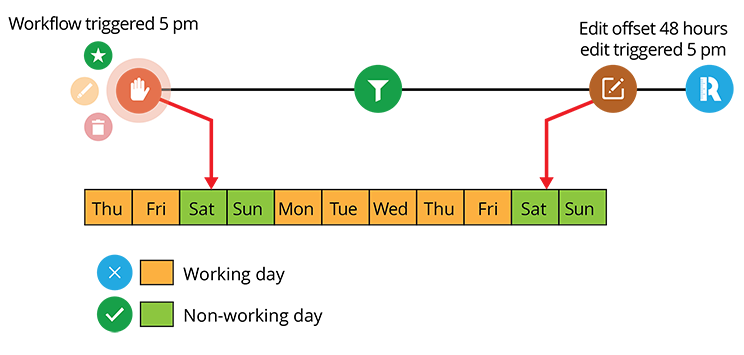
Example 2: An offset of 48 hours
Using On working days.

Using On non-working days.
Using Both.

Link
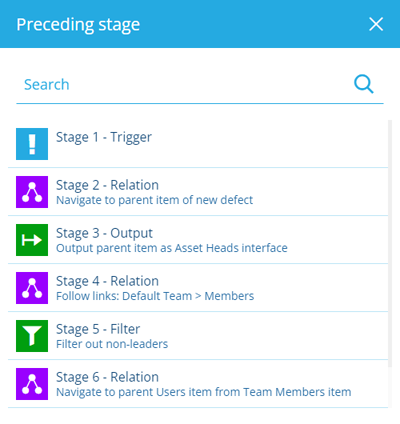
The Link tab lets you link to a value in the output of any preceding stage in the current branch path.
If the selected stage outputs multiple items, the value will be taken from the output item that corresponds to the input item on the action you're configuring.
In other words, you can travel backwards along the causal chain of items and link to the one outputted at a particular stage.
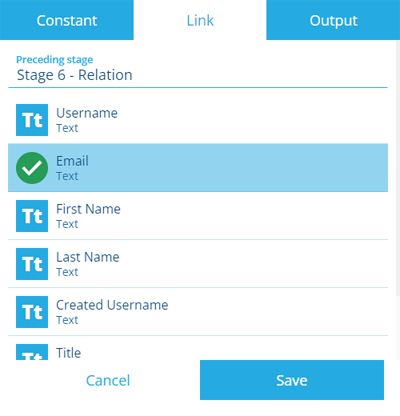
After selecting a stage, choose an attribute on the output item to link to. Only compatible attributes will be listed. If the action attribute you're configuring expects an item, select the listed Item property.
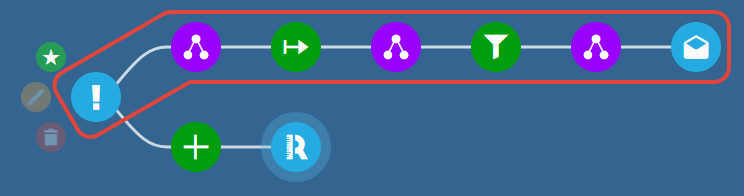
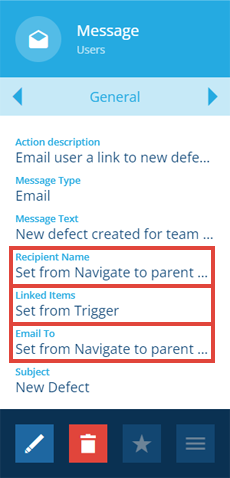
For example, imagine an event workflow that messages a team's leaders when a defect is created for a team asset. Using Relation, Output and Filter actions, we can fetch the Users item linked to the Team Members item of the Teams item that's set as the Default Team of the parent asset of the new defect item.
When configuring the final Message action, we can set its Email To and Recipient Name attributes dynamically, by linking them to the Email address and First Name attributes of the Users item output by the previous node (Stage 6). Similarly, we can populate the action's Linked Items attribute with the new defect by linking to the root node (Stage 1).
Output
The Output tab lets you reference the value(s) of the total output of any action in the sequence.
This means you can reference actions on different branches. If the selected action outputs multiple items, a value will be taken from all of them!
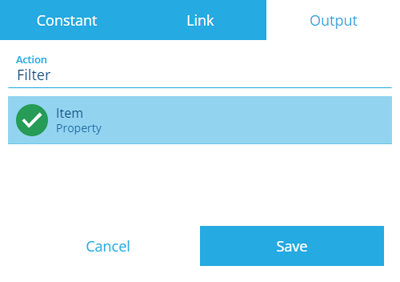
After selecting an action, choose an attribute on the output item(s) to link to. Only compatible attributes will be listed. If the action attribute you're configuring expects items, select the listed Item property.
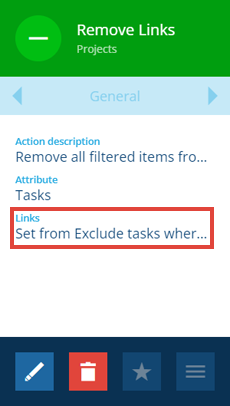
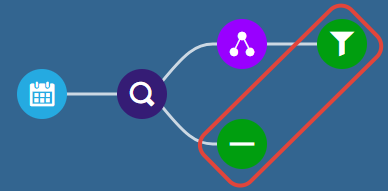
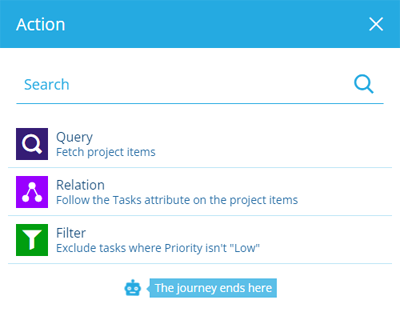
For example, imagine a schedule workflow that removes low priority tasks from projects every 2 months. It uses a Relation action to follow the Tasks attribute on the Projects design. It then uses a Filter action to exclude the task items whose Priority attribute isn't "Low".
Starting a new branch from the Query action, we can then add a Remove Links action that targets the Tasks attribute on the project items. We can set the action's Items attribute dynamically, by referencing the Item property of all the task items output by the Filter action.