Editing workflow properties
Configure a workflow's triggers
After creating a workflow, you can edit any of the properties set during its creation. You can even change it to a different type!
To edit the workflow you're viewing, select the root node to display its properties in the right panel. Use the tab bar to switch to the relevant tab and then select Edit in the action bar.
General properties
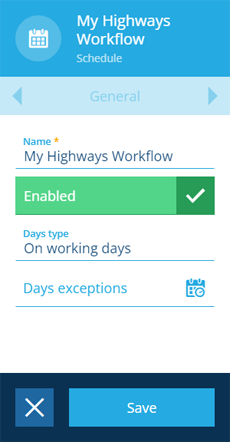
Edit any of the following fields:
-
Name * - enter a distinct name that clearly identifies the workflow.
-
Enabled - disabled by default! Enable when the workflow is built and ready to use.
Event / schedule workflows only:
-
Days type - restrict the workflow to trigger only on working days, non-working days, or both.
-
Days exceptions - specify date ranges when the workflow shouldn't be triggered. You can exclude up to, and after, a certain date.
Select Save to finish.
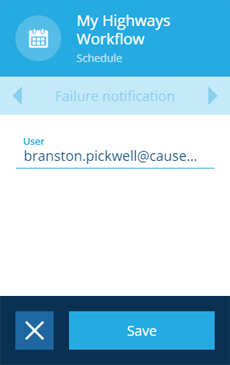
Failure notification
Edit the following field:
- User - nominate a user in your company project to be emailed if the workflow fails.
The tab also displays these read-only fields:
-
Failures count - the total number of times the workflow has failed.
-
Time of last failure notification - when the chosen User was last notified.
Select Save to finish.
Trigger properties
The contents of this tab differ depending on the workflow type.
Event workflows
Edit any of the following fields:
-
Listen on create - if enabled, the workflow will trigger when an item of the design/interface is created.
-
Listen on update - if enabled, the workflow will trigger when an item of the design/interface is updated.
-
Listen on delete - if enabled, the workflow will trigger when an item of the design/interface is deleted.
-
Design or interface - choose the design/interface that will be monitored for changes. This acts as the top-level filter for the workflow. To further refine the scope, you can add Filter actions when building the workflow.
-
Collections - select the collection(s) that will be monitored for changes.
-
Attribute - if Listen on update is enabled, you can restrict it to one or more of the item's attributes. Only the selected attributes will trigger the workflow if they're updated.
Select Save to finish.
If changing Design or interface or Attributes invalidates the current action sequence, saving will fail with an error.

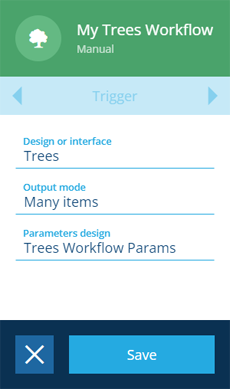
Manual workflows
Edit the following fields as needed:
-
Design or interface - when a user triggers the workflow, they'll need to select at least one item of the chosen design/interface. If left blank, the workflow will operate without any input items.
-
Output mode - choose one:
-
Many items (default) - all input items will be processed by a single workflow.
-
One item - each input item will be processed by a separate workflow. Slower but makes certain operations possible, e.g. if a workflow creates an invoice when supplied with an account's Item ID, it will run once for each account, thereby generating an invoice for each one.
-
-
Output action - choose the action in the manual workflow that represents its final output. This determines the output of a manual workflow reference.
-
Parameter design - if the workflow needs to receive input parameters when triggered, choose the prepared parameter design. See Workflow trigger parameters.
Select Save to finish.
If changing Design or interface invalidates the current action sequence, saving will fail with an error.
Schedule workflows
Different fields are shown for different schedule workflow types.
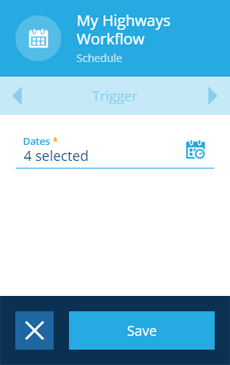
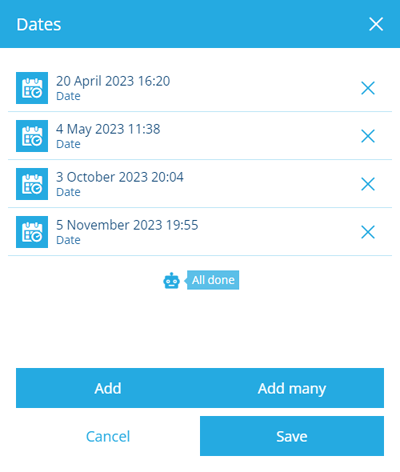
Calendar - trigger at specific dates and times, e.g. 2 July 2022 13:00
Select the Dates field and use the calendar picker to add one or many dates to the list. Select Done to continue.
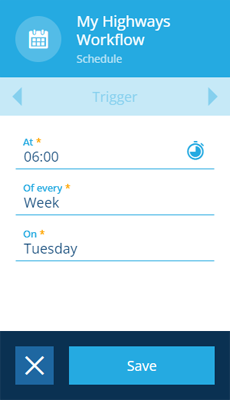
Repeat - trigger on certain days of the week/month, e.g. every Monday and Friday, the 23rd of each month
Fill in the following fields as needed, then select Done to continue:
-
At * - set the time for the workflow to trigger.
-
Of every * - choose a weekly or monthly period.
-
On * - select one or more days of the week or dates in the month.
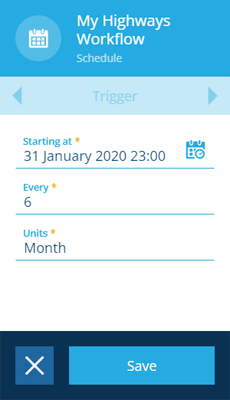
Frequency - trigger at set intervals, e.g. every 6 hours, every 2 weeks, every year
Fill in the following fields as needed, then select Done to continue:
-
Starting at * - set the date and time for the workflow to first trigger.
-
Every * - enter the number of time units.
-
Units * - choose a time unit, e.g. Minute, Day, Month.
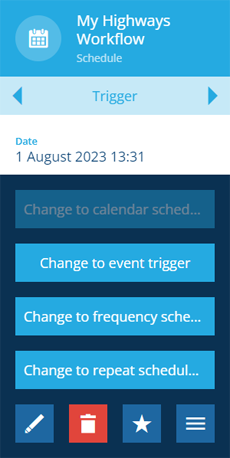
Change the workflow type
It's often possible to change the workflow type without resetting its action sequence.
To do this, switch to the Triggers tab, select More in the action bar and choose the relevant button.
Check compatibility
| From 🠛 to 🠚 | Event | Manual | Calendar schedule | Repeat schedule | Frequency schedule |
|---|---|---|---|---|---|
| Event | - | ||||
| Manual | - | ||||
| Calendar schedule | - | ||||
| Repeat schedule | - | ||||
| Frequency schedule | - |
Delete the workflow
To delete the workflow, select its root node, then select Delete in the action bar.
Deletions can't be undone, so please think carefully before doing so!